© 2024 HamiltonTileGA.com

We BUILT that BLACK AND WHITE subway tile shower.

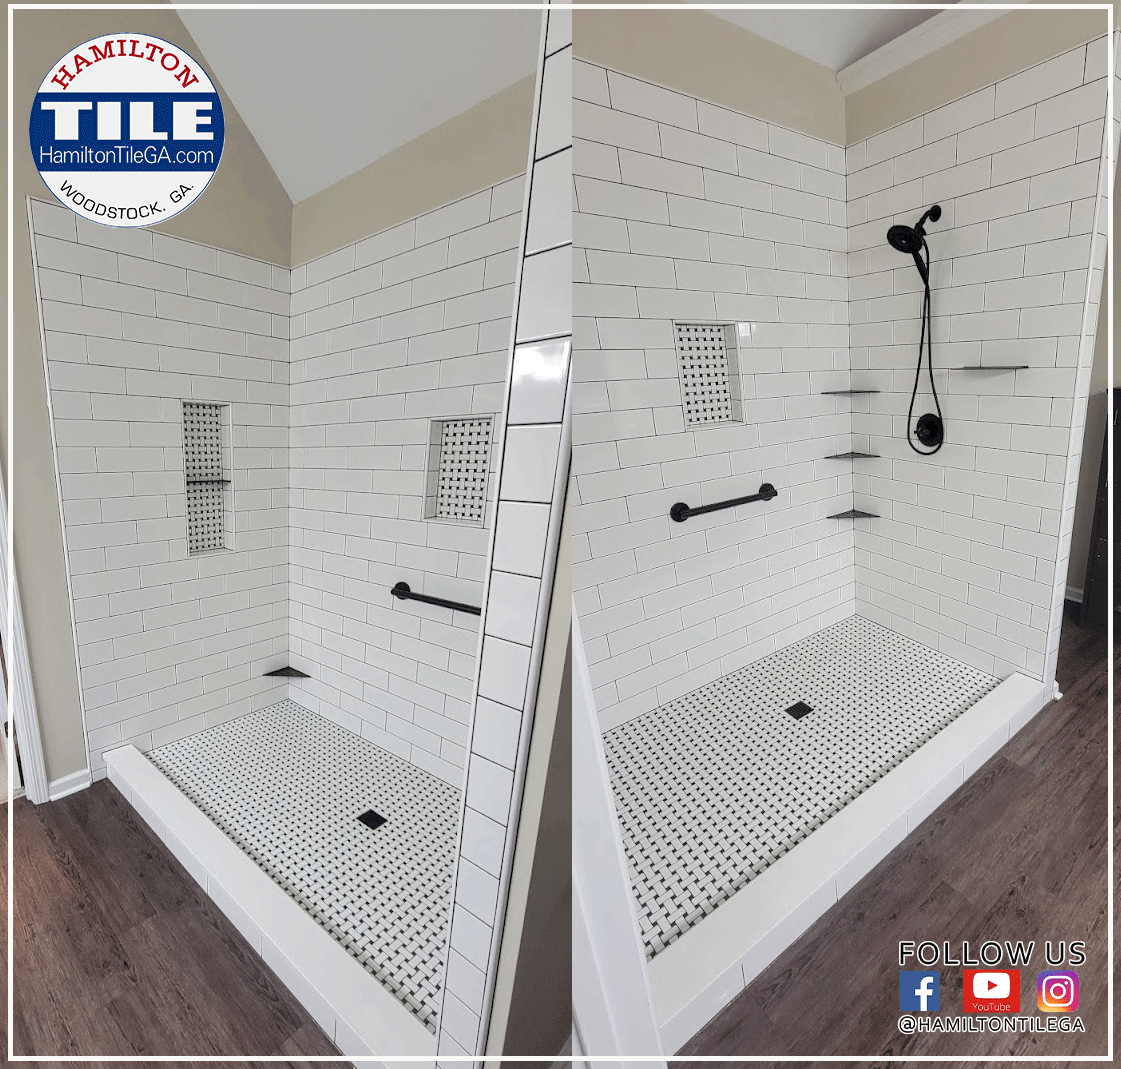
Here it is, we actually did it. We built that BLACK AND WHITE subway tile shower you’ve always wanted. Boy, it turned out nicely.

Featuring tons of storage: One large soap niche with a black Schluter shelf, one average size soap niche, 3 black Schluter corner shelves, one black self supporting rectangular shelf near the shower head and one corner shaving shelf for good measure!

That’s a lot of STORAGE and USABLE SPACE.

Top it off with BLACK fixtures, a touch of BLACK tile in the shower floor, black grab bar, a black FLO FX drain cover, black glass panel hardware and the top top BLACK Laticrete Spectra lock PRO, 2 part EPOXY GROUT.

WOW.

That black and white subway tile shower you’ve always wanted: Dallas, GA.

We loved how it turned out and our homeowner did too, with an off-sized white 4 x 12” rectangular subway tile and a black and white basket weave mosaic in the back of the boxes and on the shower floor.

Speaking of our homeowner, they were the best! It was a mutual love fest with appreciation and gratitude all around and these are the type of people that make it fun and make our vocation worth it.

They really treated us TOP NOTCH with lunches, conversation and compliments throughout this 2 week process. In fact, the homeowner helped us with the tear out…lugging out concrete blocks. She is TOUGH!

Before this remodel there was a very unsafe, builder grade shower with subway tile on a shower floor with a considerable pitch, dangerous for the disabled veteran homeowner.

They nailed the design with the help of Cindy over at Tilehouse of Marietta and we built them a functional, long lasting shower.

Now if you’re looking to hire us to do work for you, you probably care most about “How’s it built”?

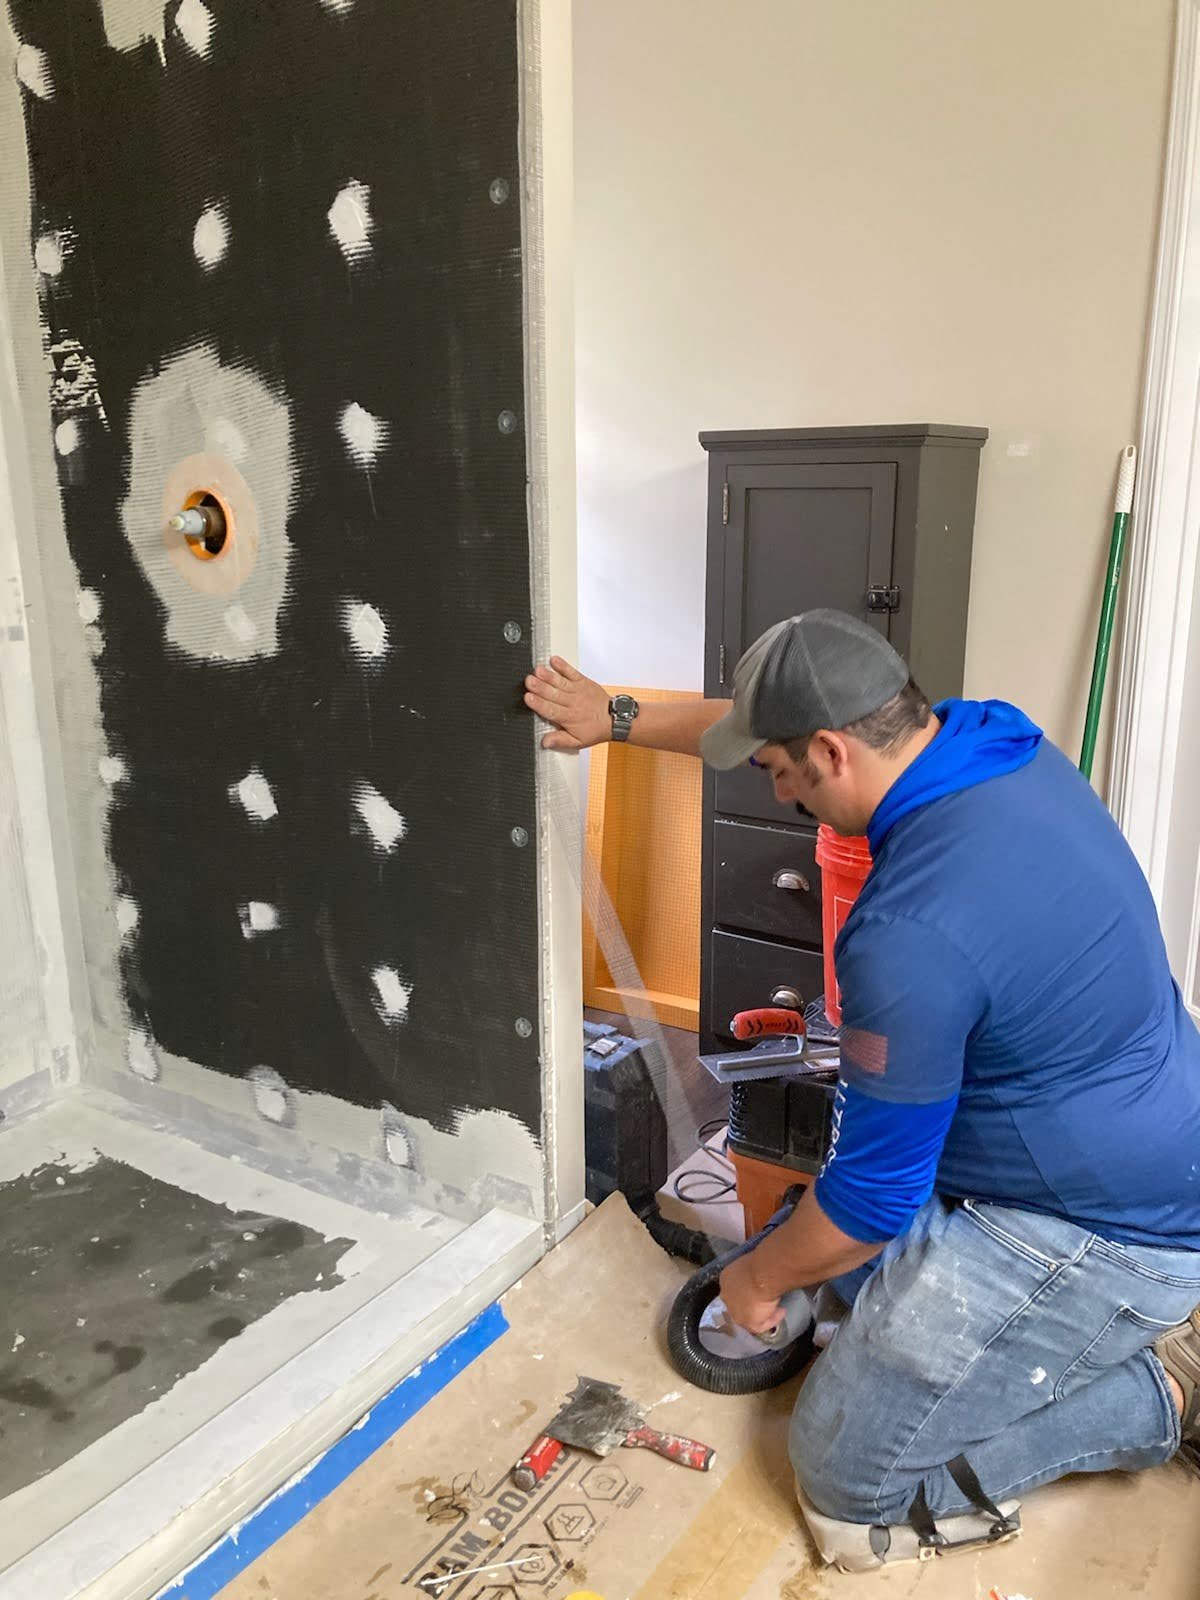
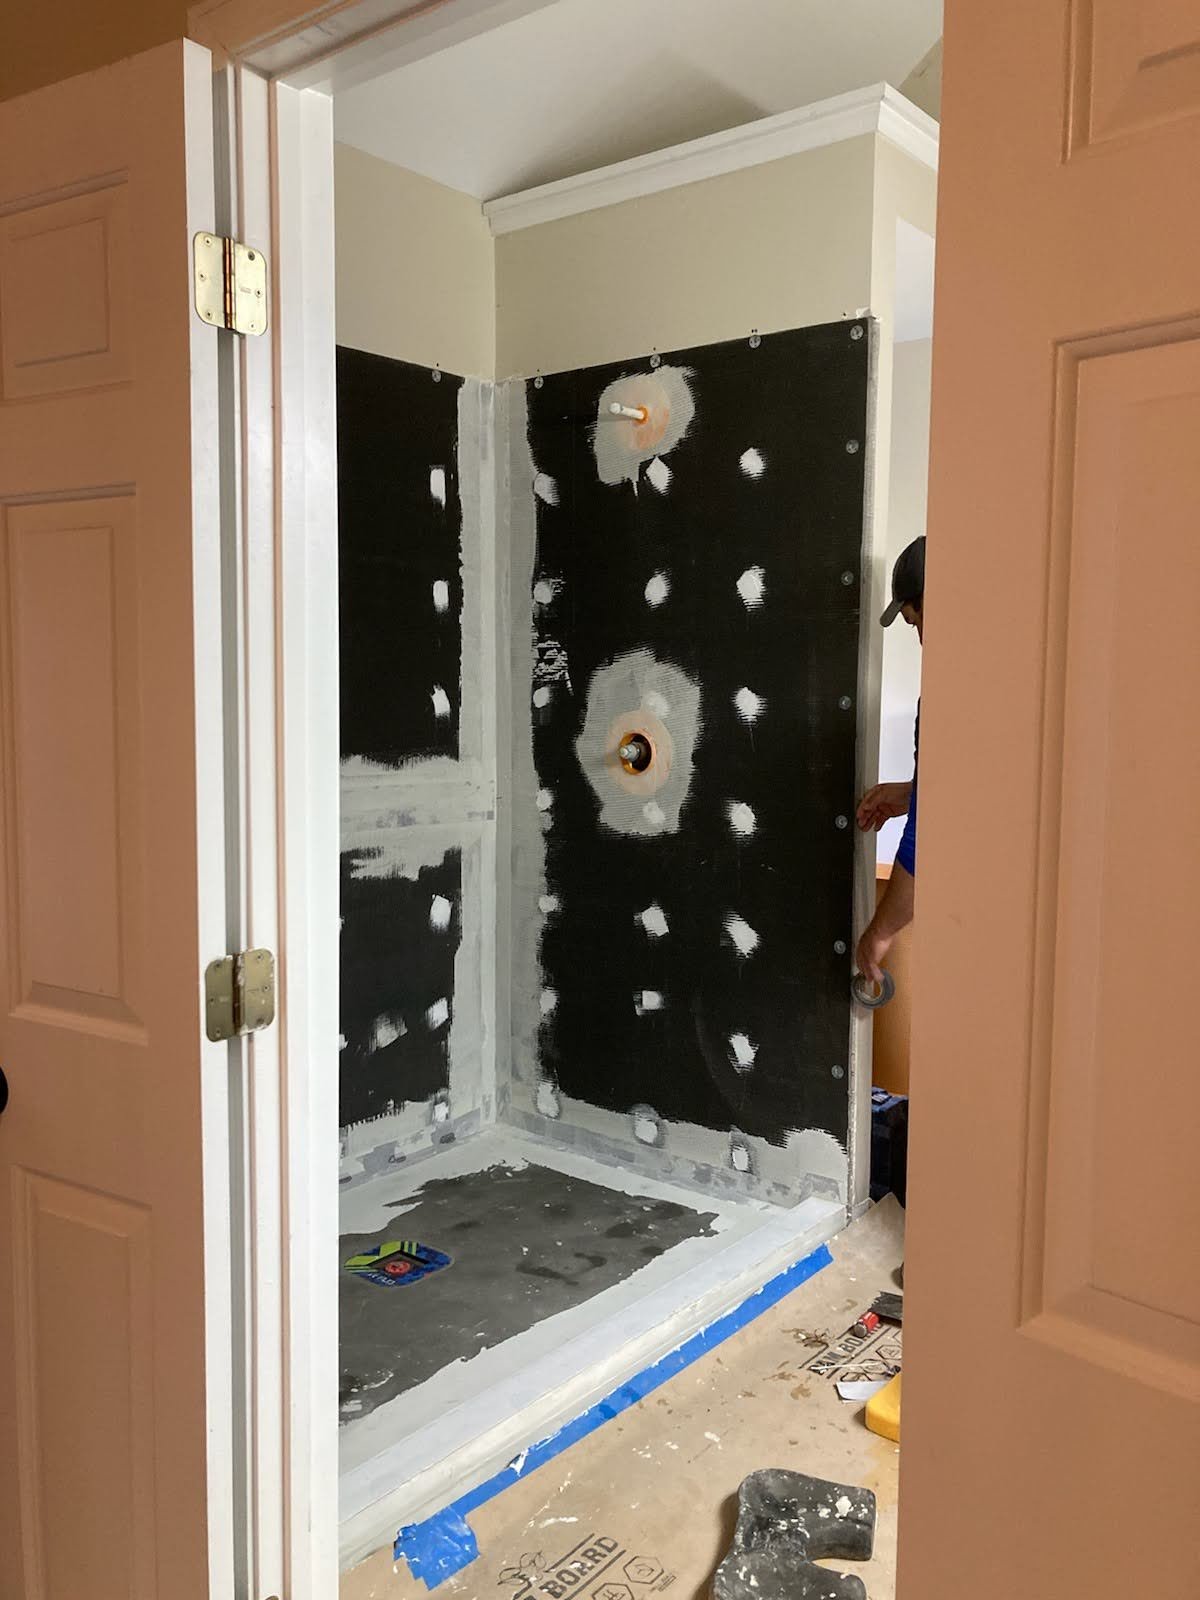
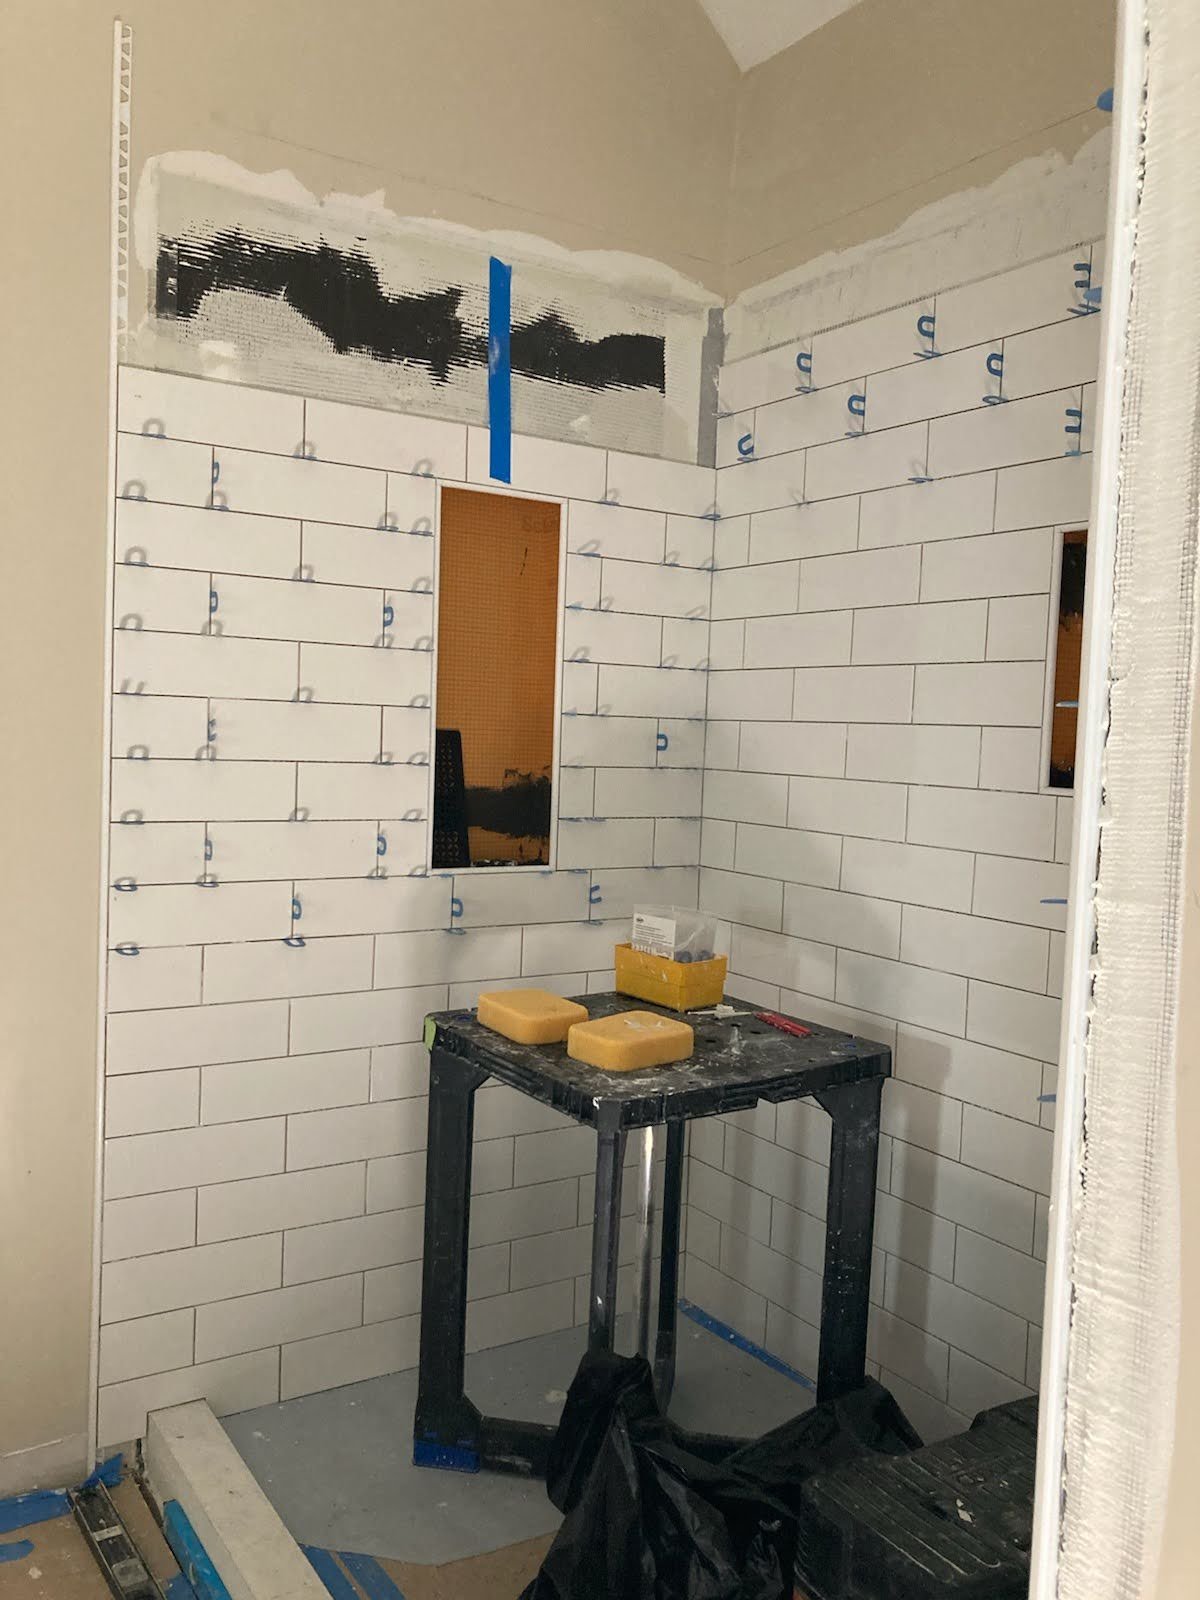
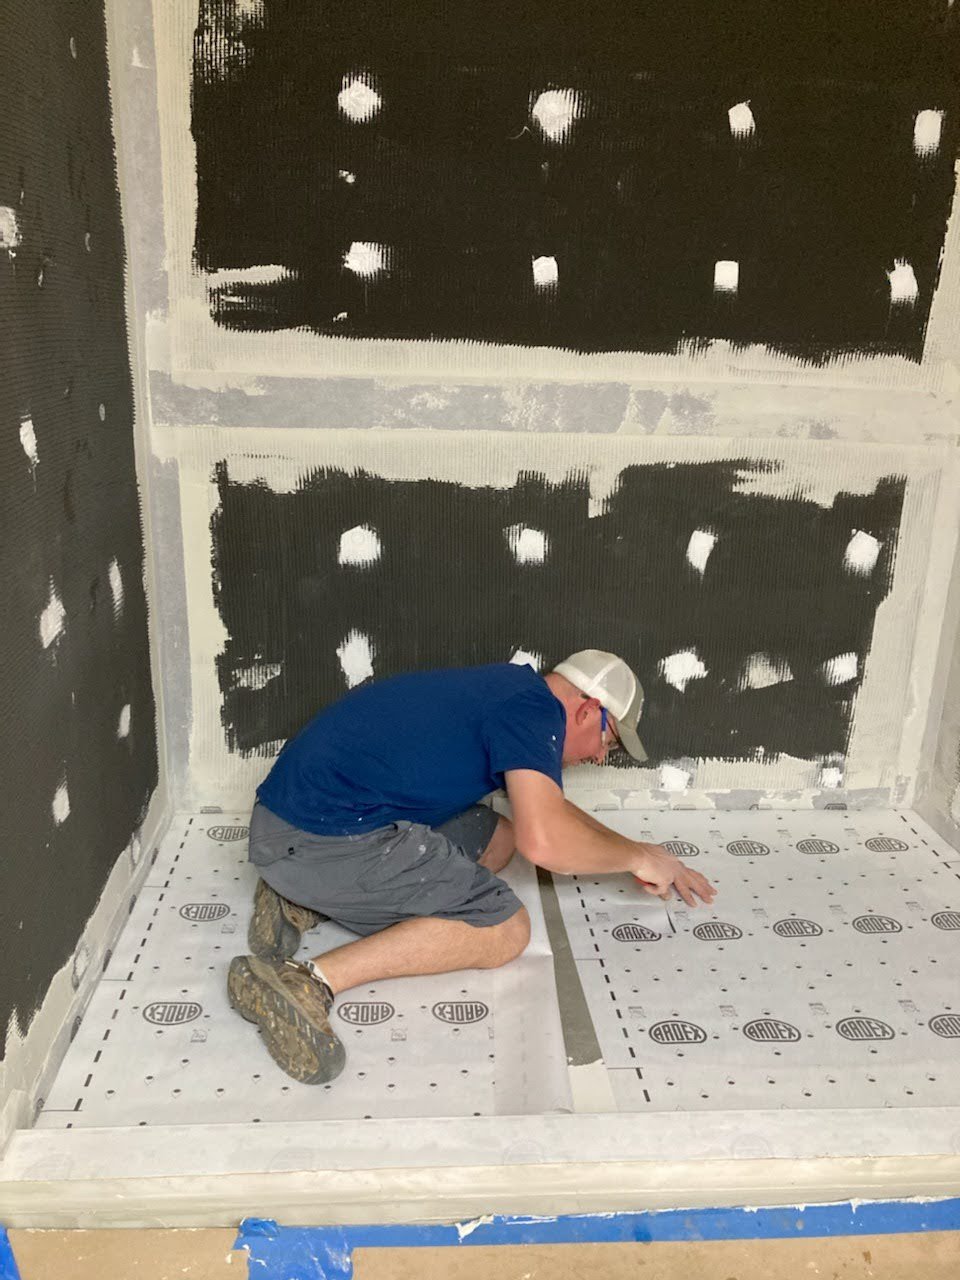
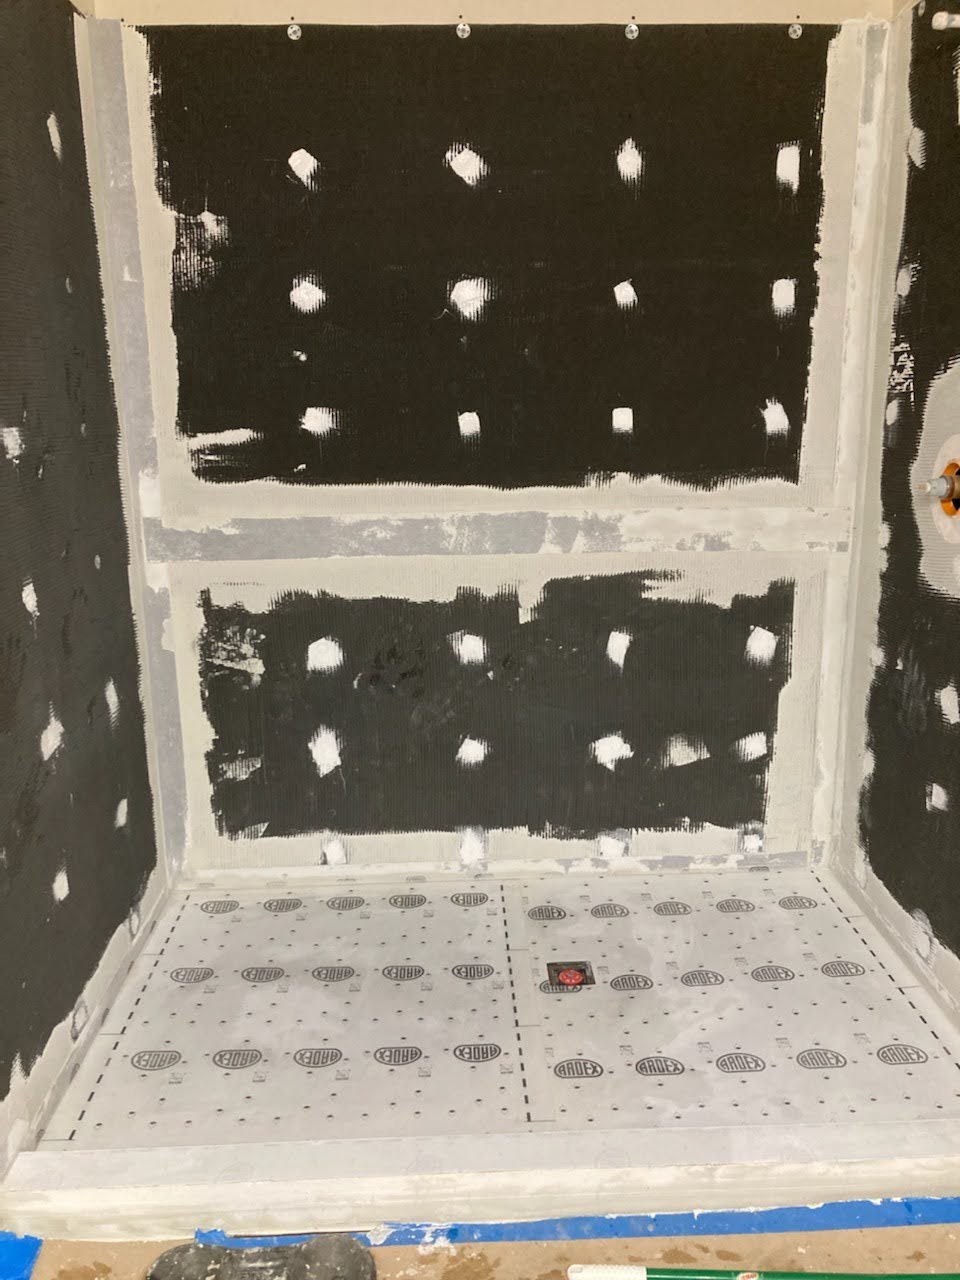
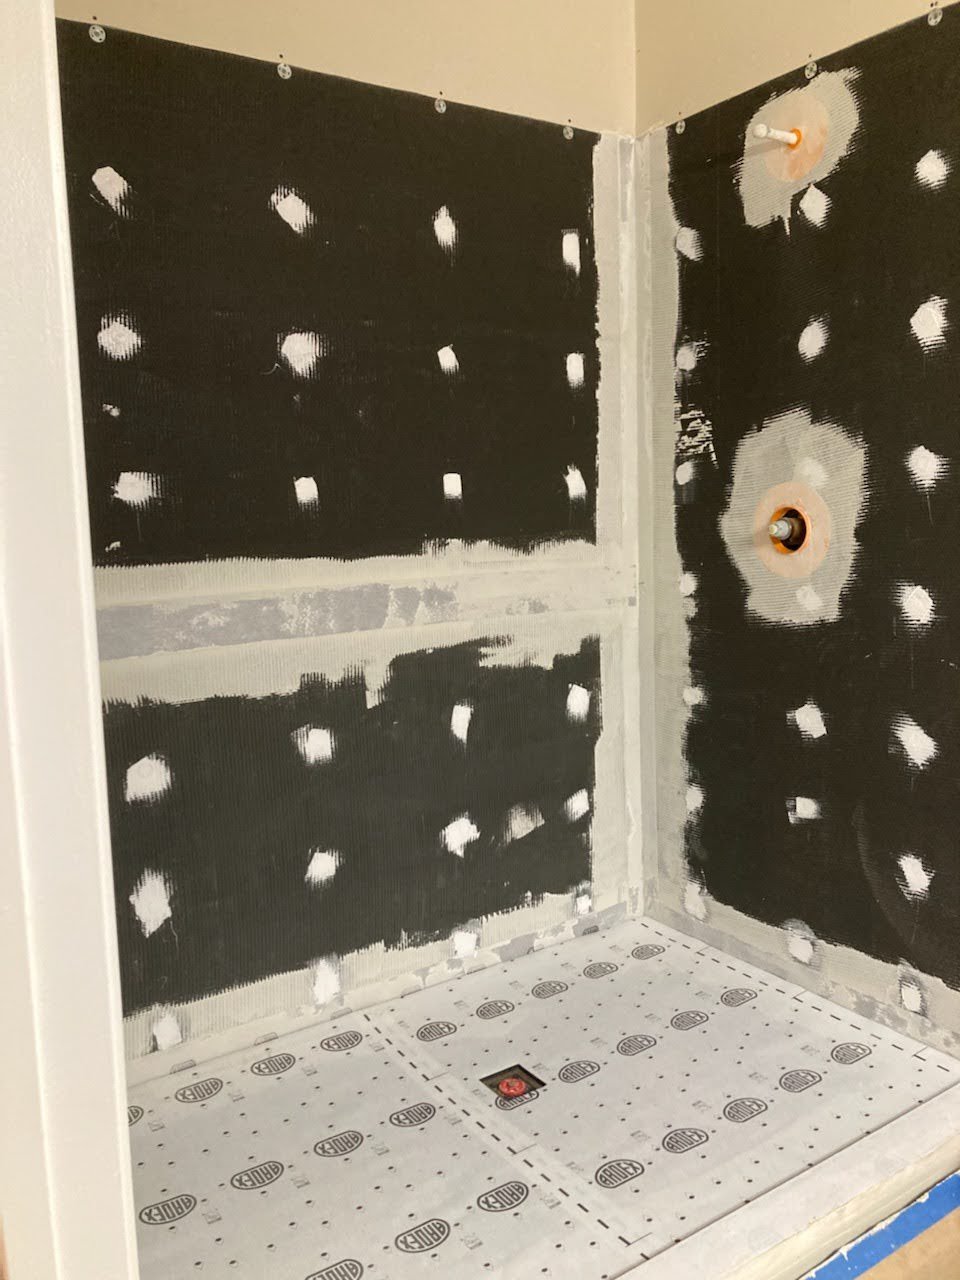
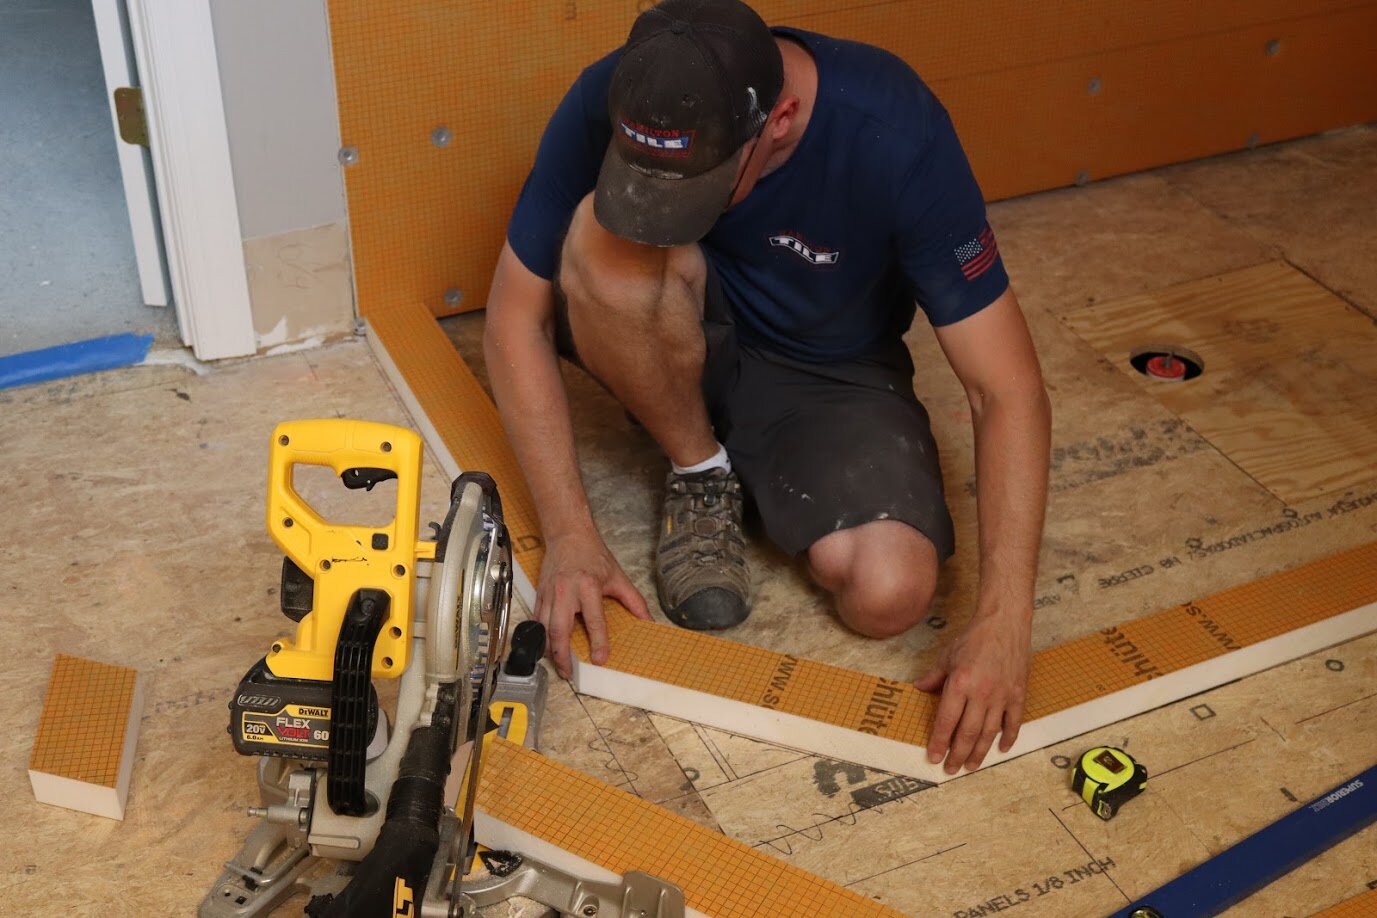
First, this is mostly an Ardex brand shower. Ardex is a German company that is comparable to Schluter Systems. The board you see on the walls in the prep picture is Ardex brand foam board, which is waterproof throughout with a cementitious outer coating that the tile gets stuck to.

We’ve been using a product by Built with Foam to flatten our walls and that is where the skill is. Jason has gotten to be quite good at fixing wonky framing over the years to get a FLAT and PLUMB substrate to work with. Here’s how we do it:

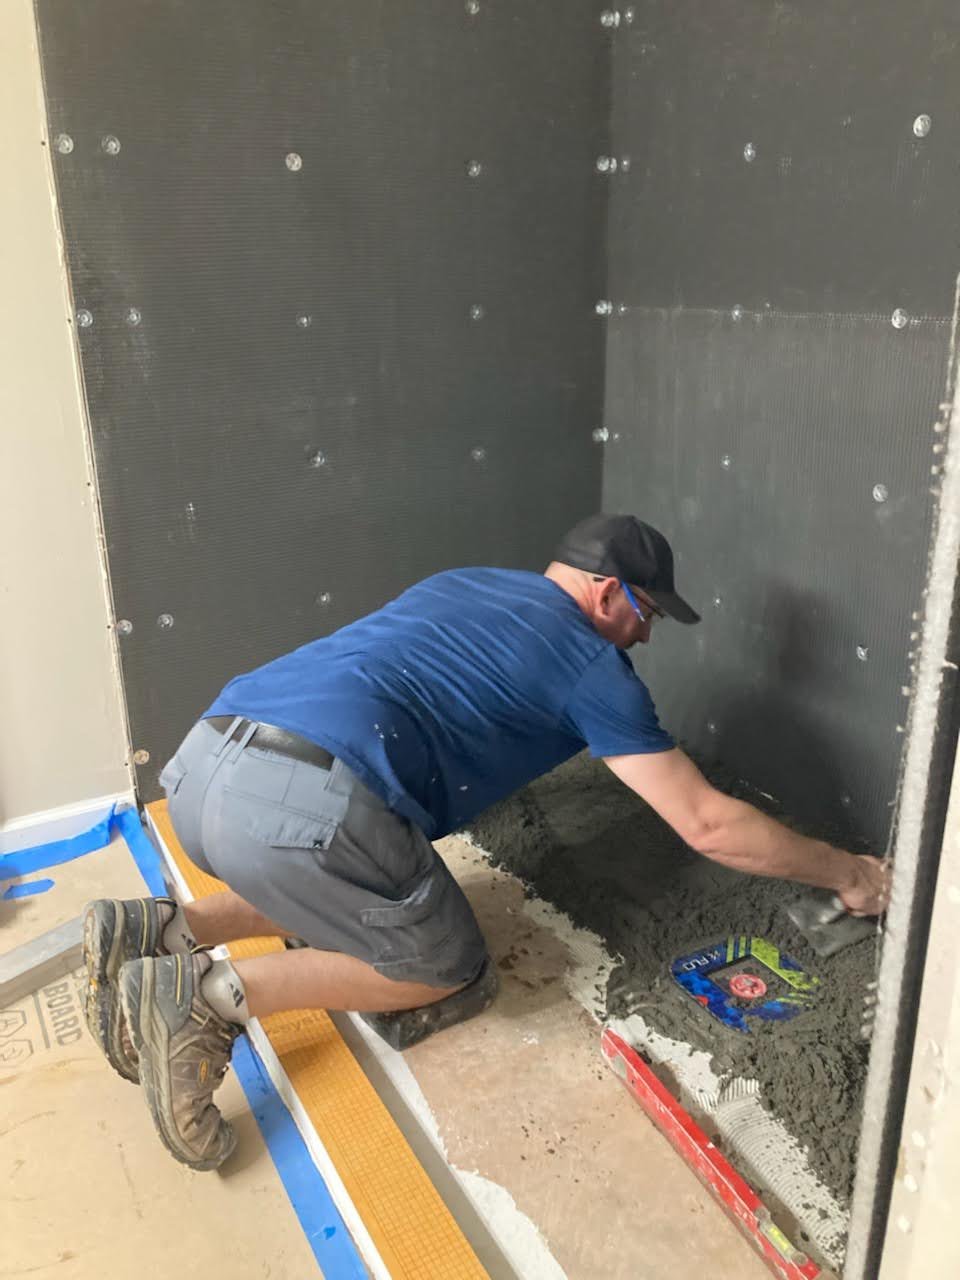
Once the walls are flattened the backer board goes up. We custom packed out shower pan with Laticrete’s dry pack, which we like the best…

You can see that we use 2” Schluter structural foam to build our curbs. We have more flexibility with the SIZE of the curb and it is more cost effective to get one sheet of the 2” foam and rip down MANY curbs this way.

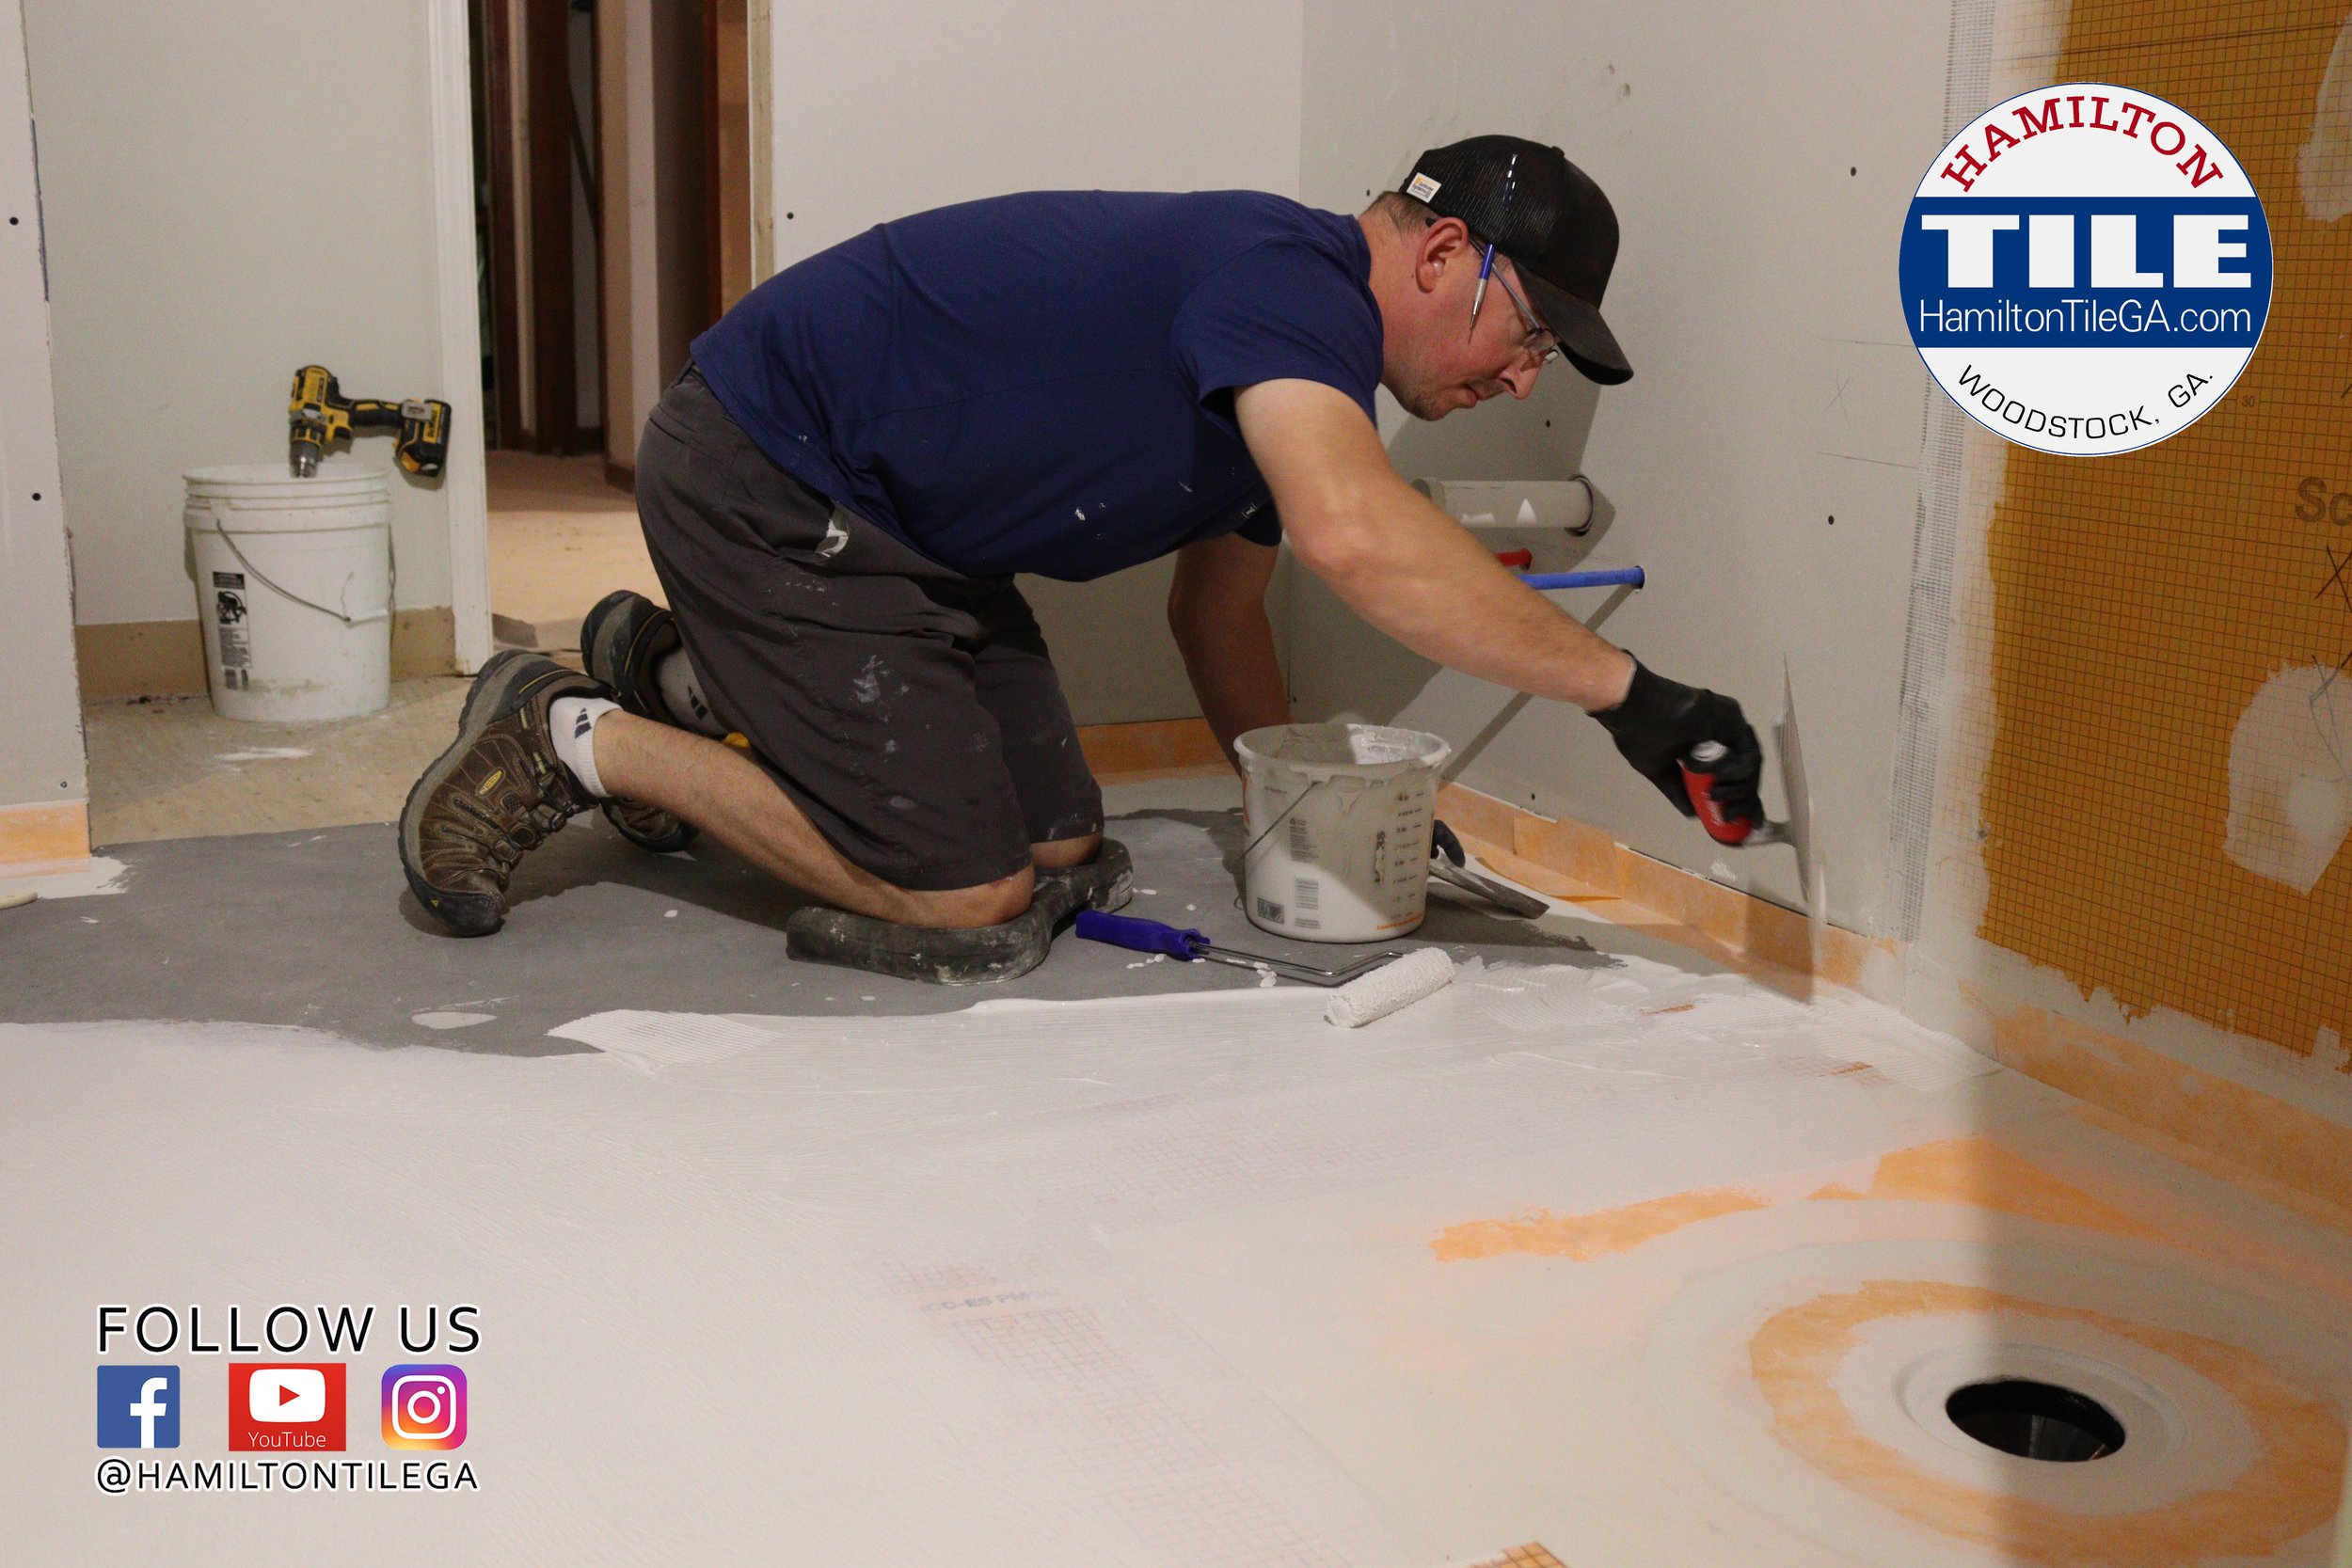
We waterproofed on top of our pan and curbs and all seams with Ardex sheet membrane, then we FLOOD TESTED our shower for 24 hours and we came back and set our floor. We covered the floor with cardboard and started on our walls.

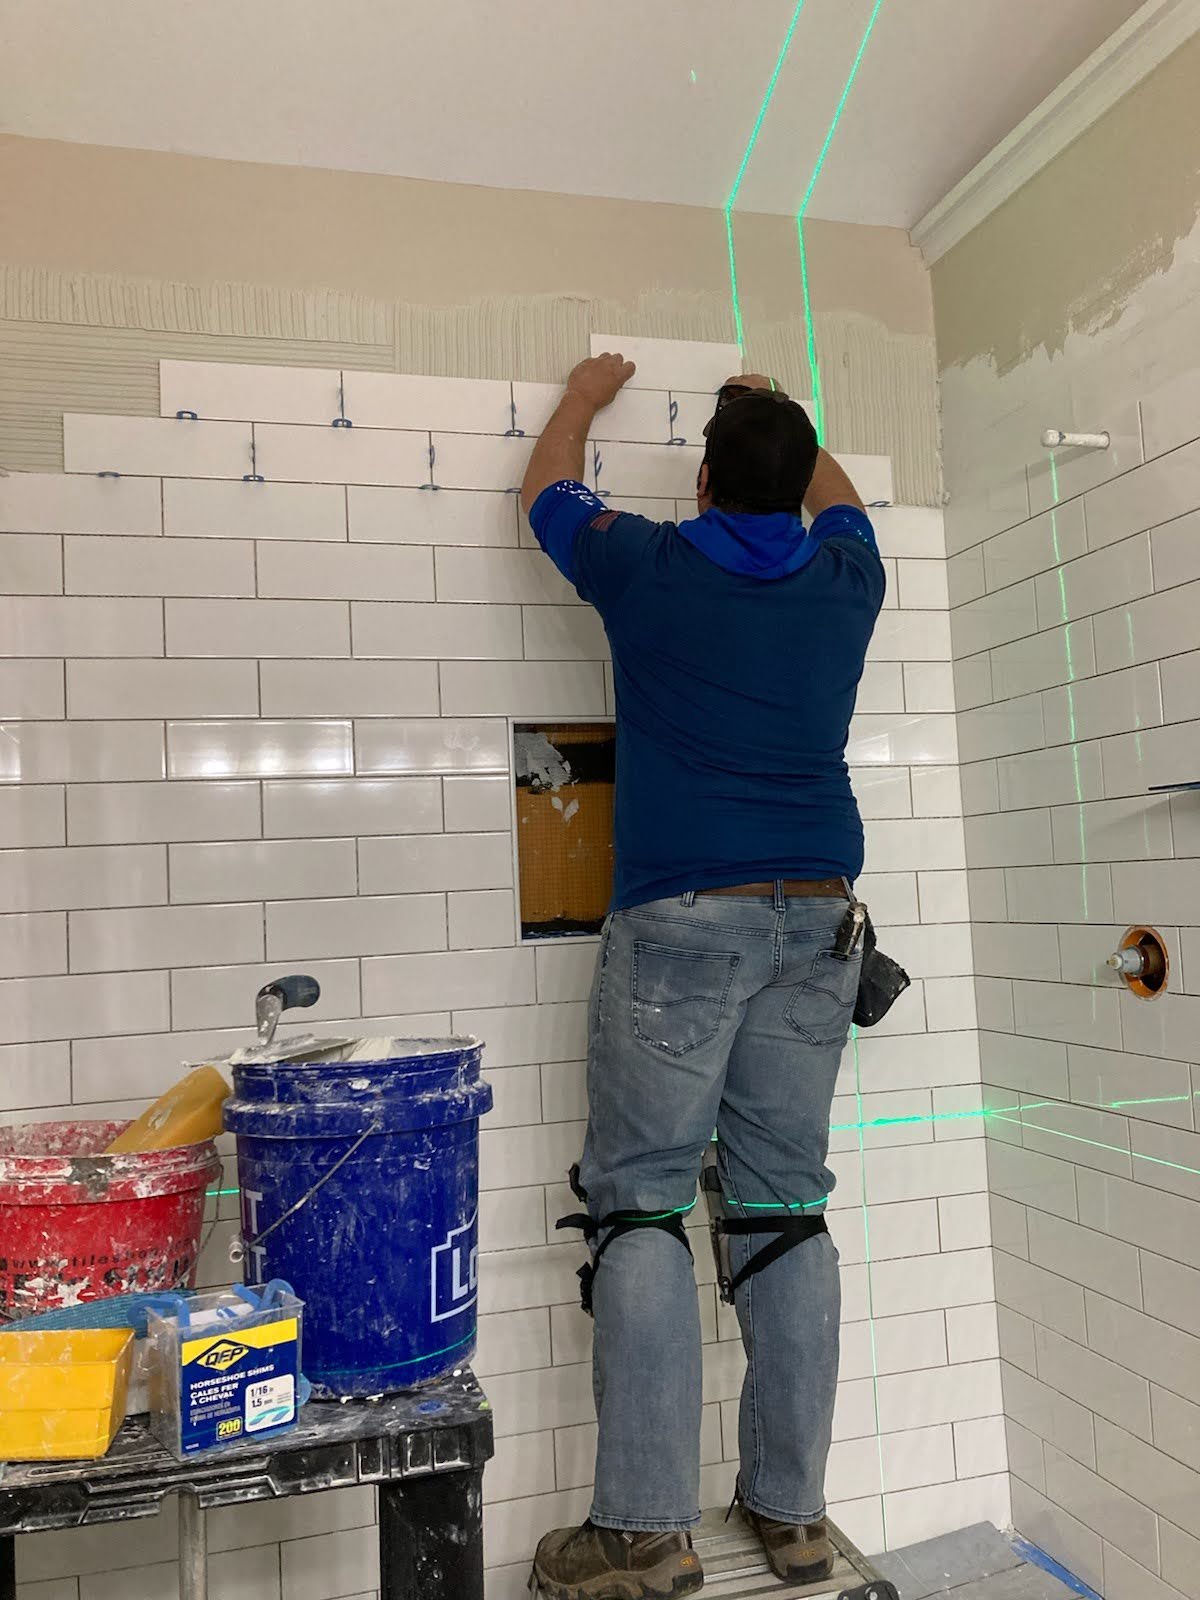
EVERY SINGLE TILE on this shower was “BACK BUTTERED” and had excellent coverage. Coverage means the thin set ridges behind the tile are COLLAPSED and covering the entire tile.

We sanded all cut edges.

We siliconed all plane changes inside the shower with Laticrete’s Latisil 100% silicone. That’s the good stuff, we have found.

So, you notice a bunch of different products used.

WE SIMPLY USE WHAT WE HAVE FOUND TO BE THE BEST PRODUCTS THROUGH OUR EXPERIENCE.

All of our jobs get a lifetime guarantee from Hamilton Tile that our showers WILL NOT LEAK or degenerate due to product or installer error.

That’s it, this is how we built our shower and we stand behind our work!

Check out the IN PROGRESS photos taken by our awesome homeowner:
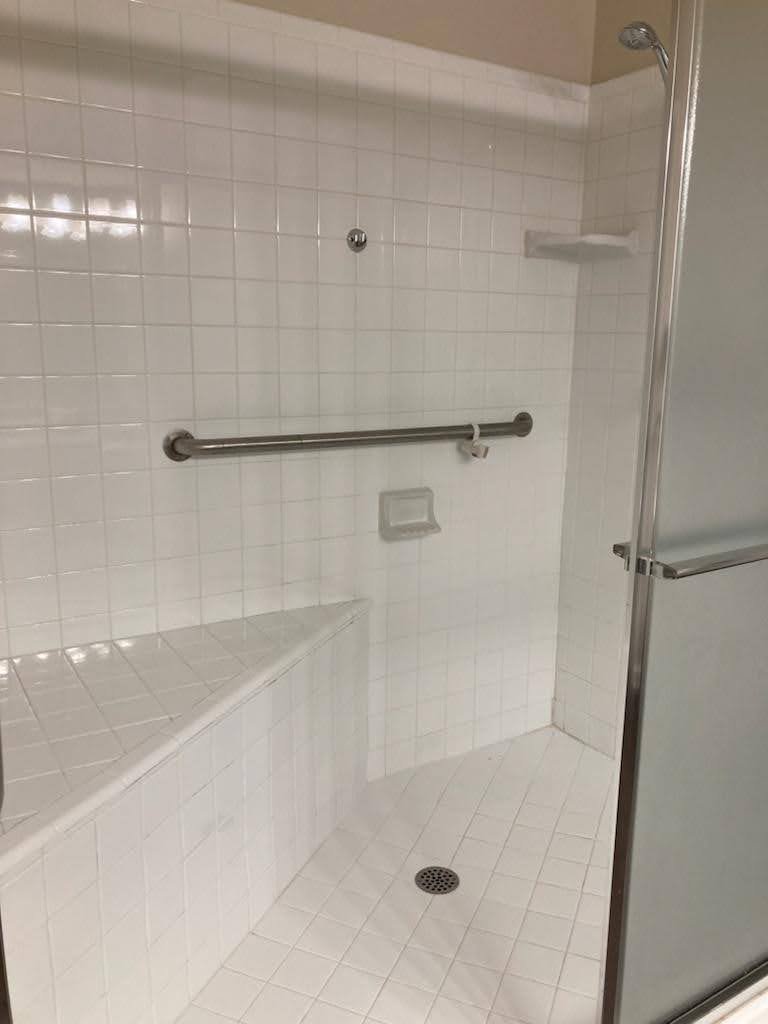
The ultimate “BEFORE AND AFTER” I love these so much. Look at that contrast!

The last thing we do is clean the glass installed by Chattahoochee Shower doors of Johns Creek. You read that right, WE CLEAN THE GLASS and after that, this black and white subway tile shower was DELIVERED.

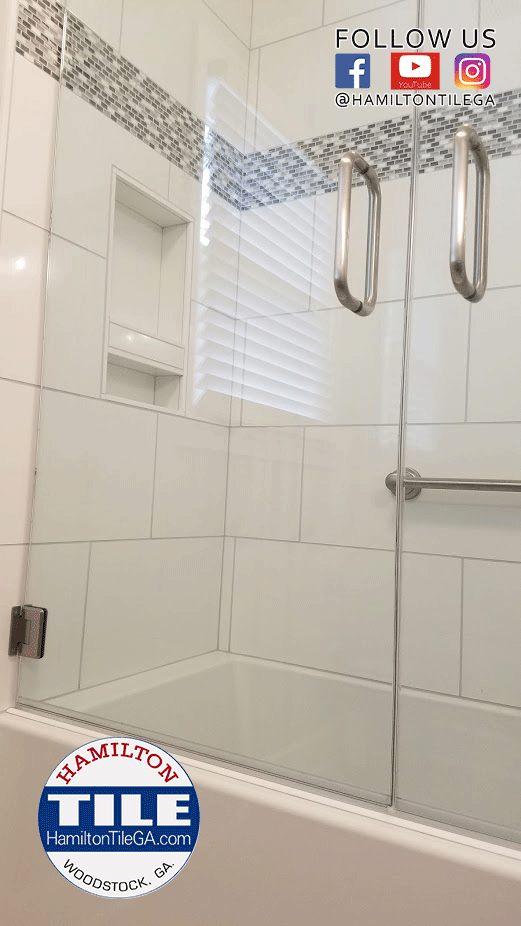
This tile is a 4x12” white Intercermic tile was set with a 1/6” grout joint. The layout worked best with mirrored tile corners. Check out this blog article on the topic of a “mirrored vs. wrapped tile corner”.

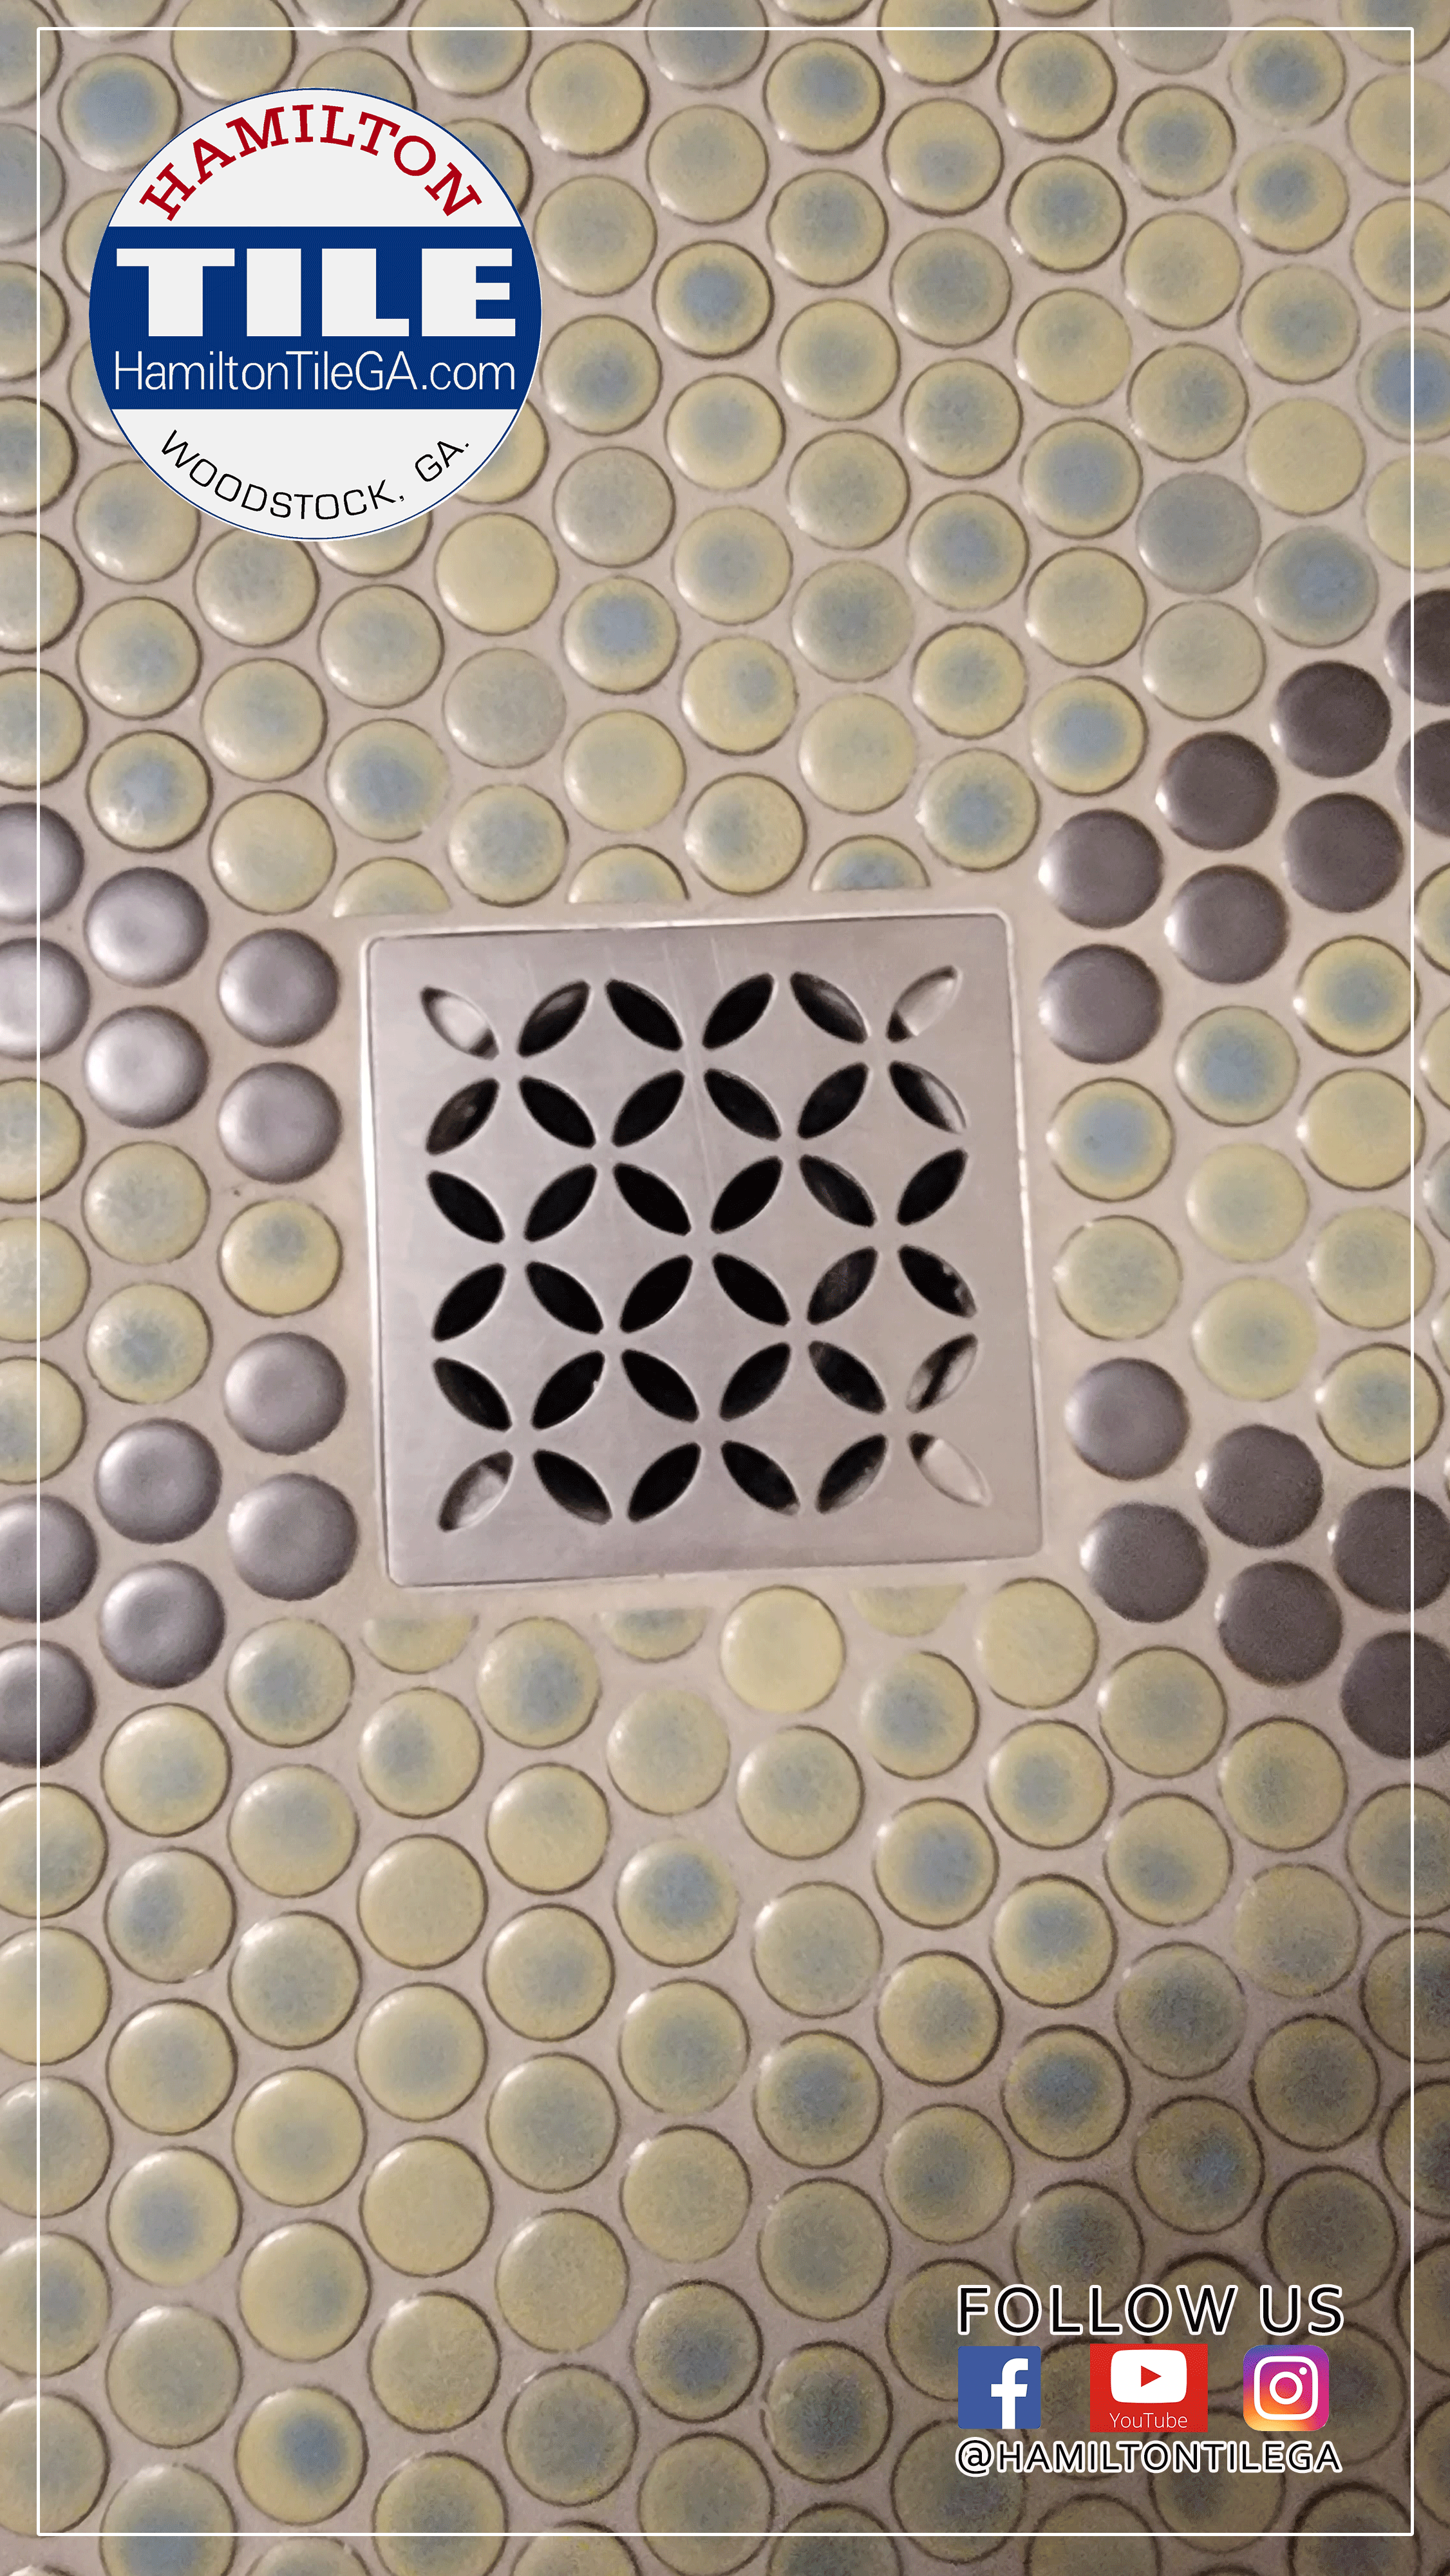
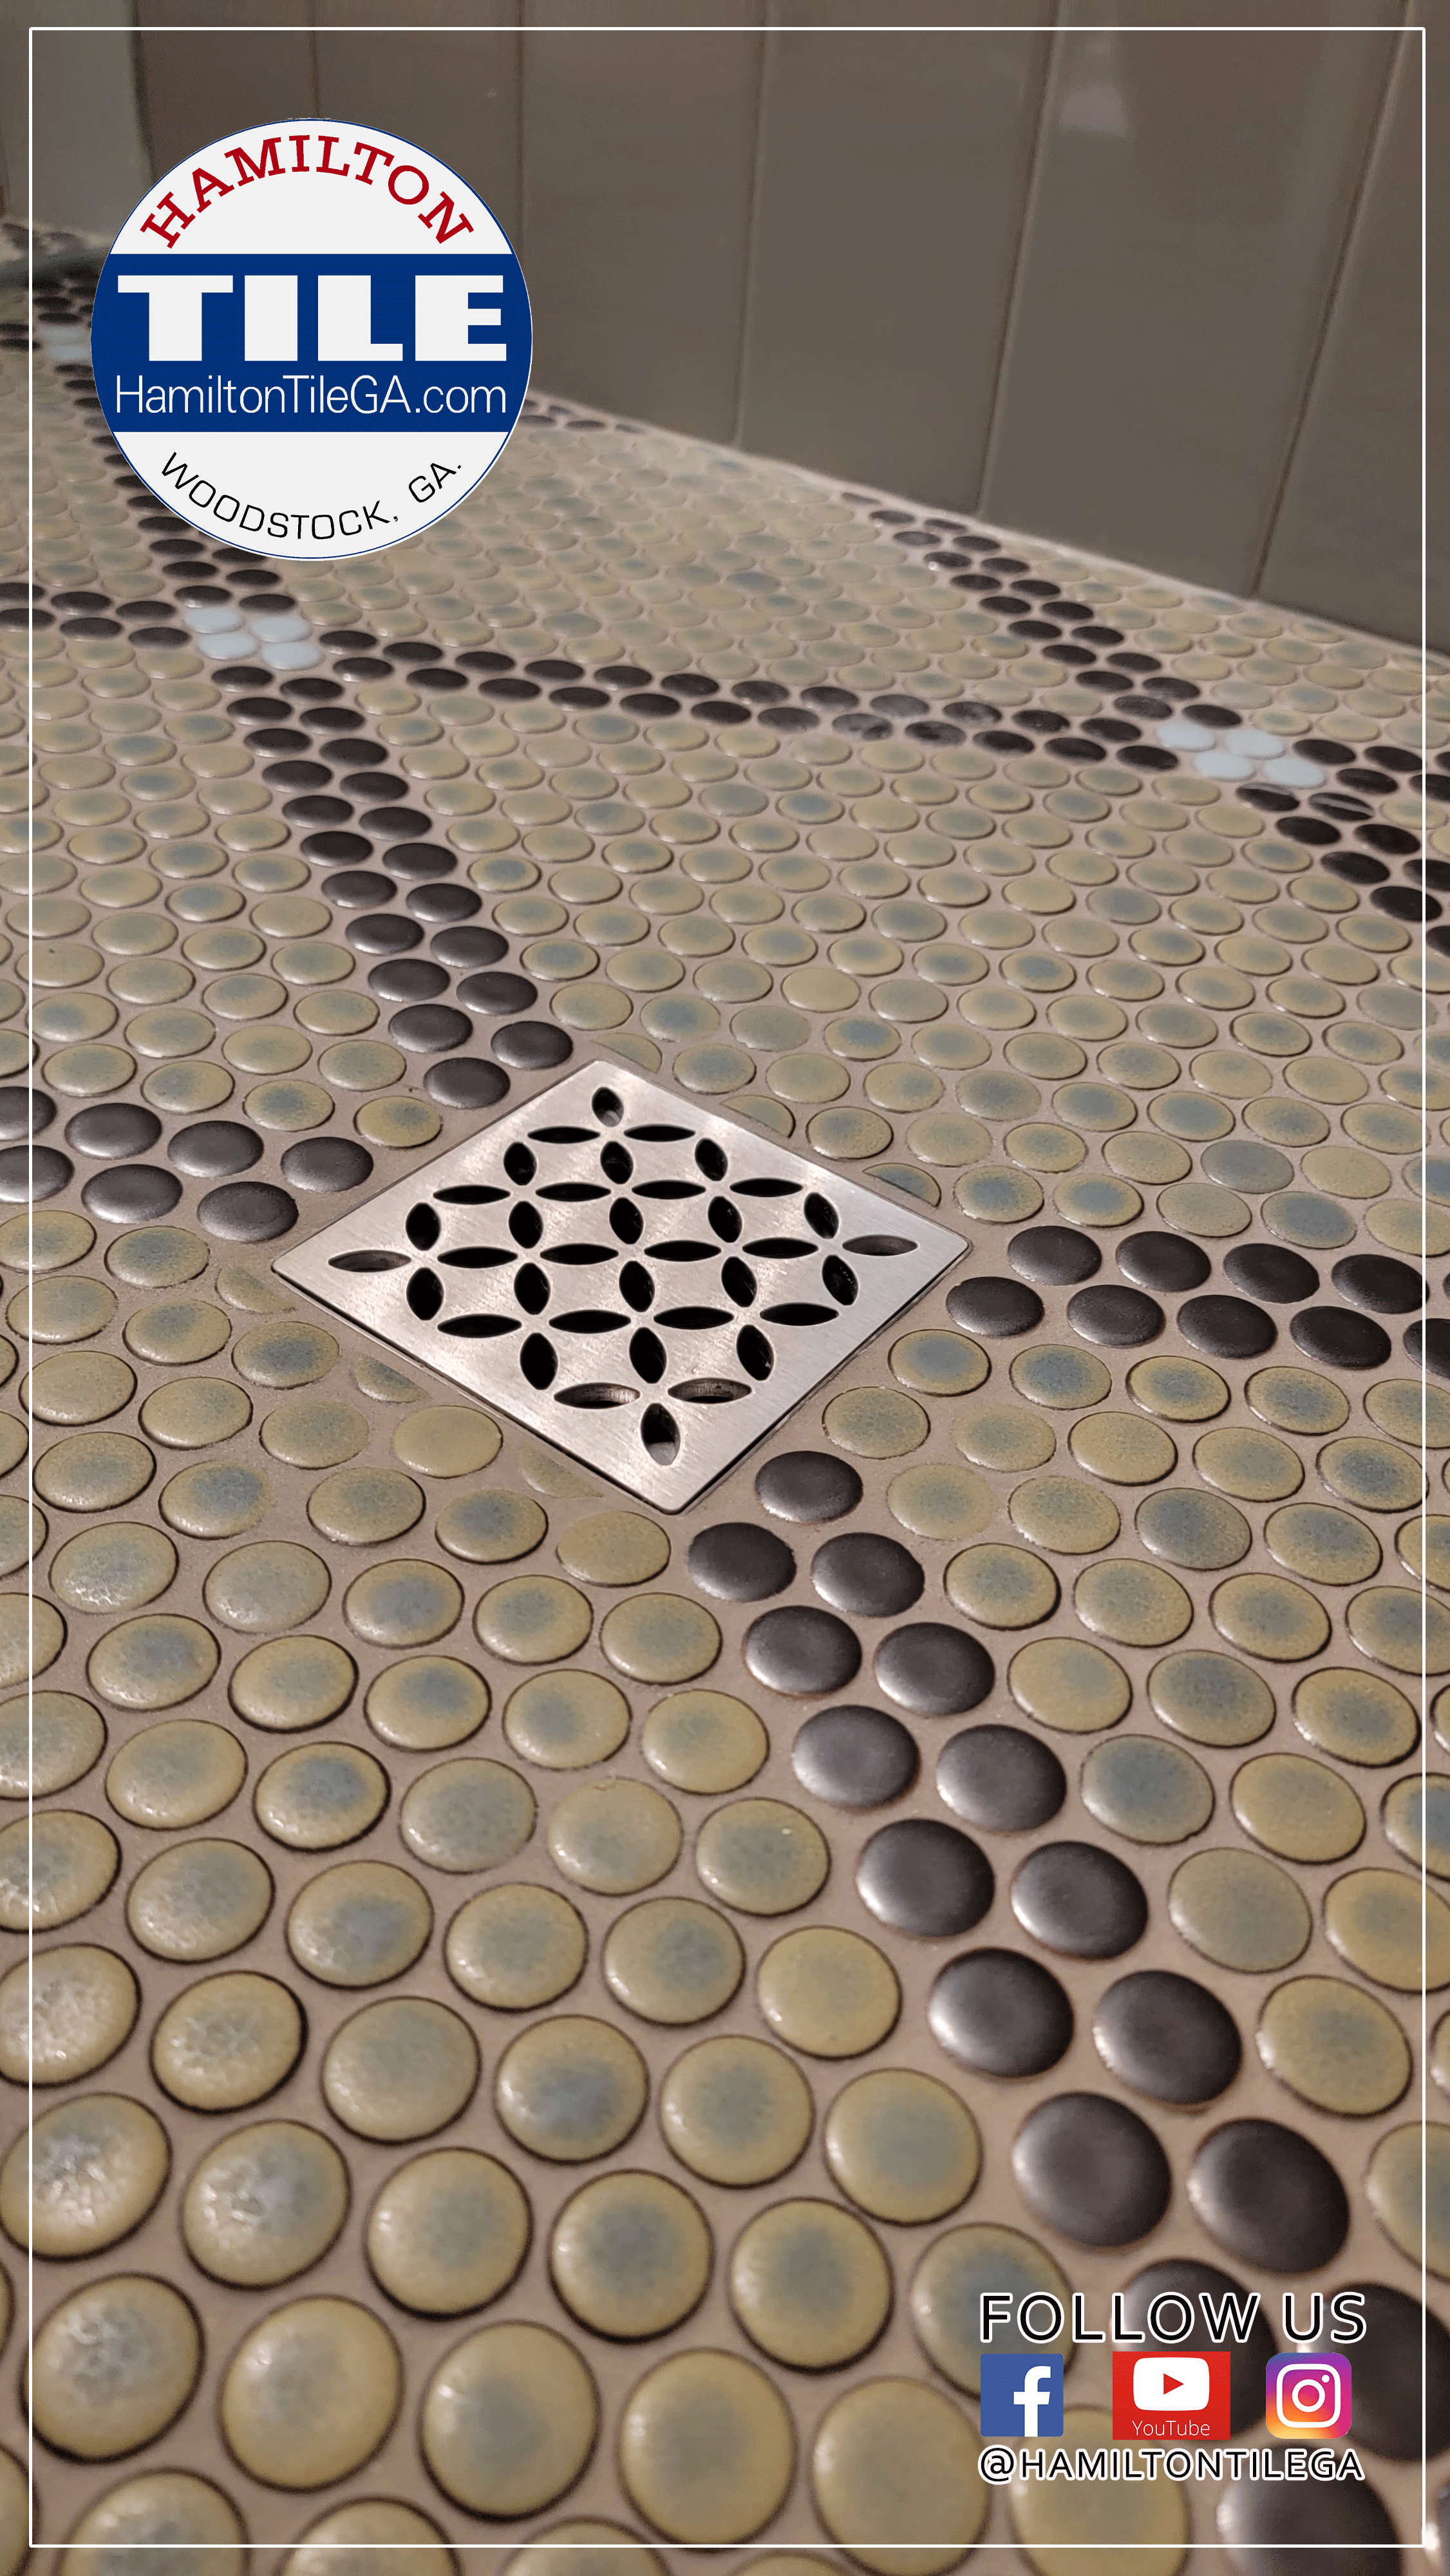
The shower floor was a White and Black Basketweave Ceramic Mosaic Tile coupled with a black FloFX drain which is, in our opinion, the best drain on the market. It is a PVC bond flange drain made by a company founded by a tiler. It really shows in the smart design, which seems like it was made by someone who has done a lot of tile!

Notice the drain is NOT CENTERED. We did it like this because the drain position was set without going into more major demolition. The homeowner elected to leave it where it was as not to add to the project.

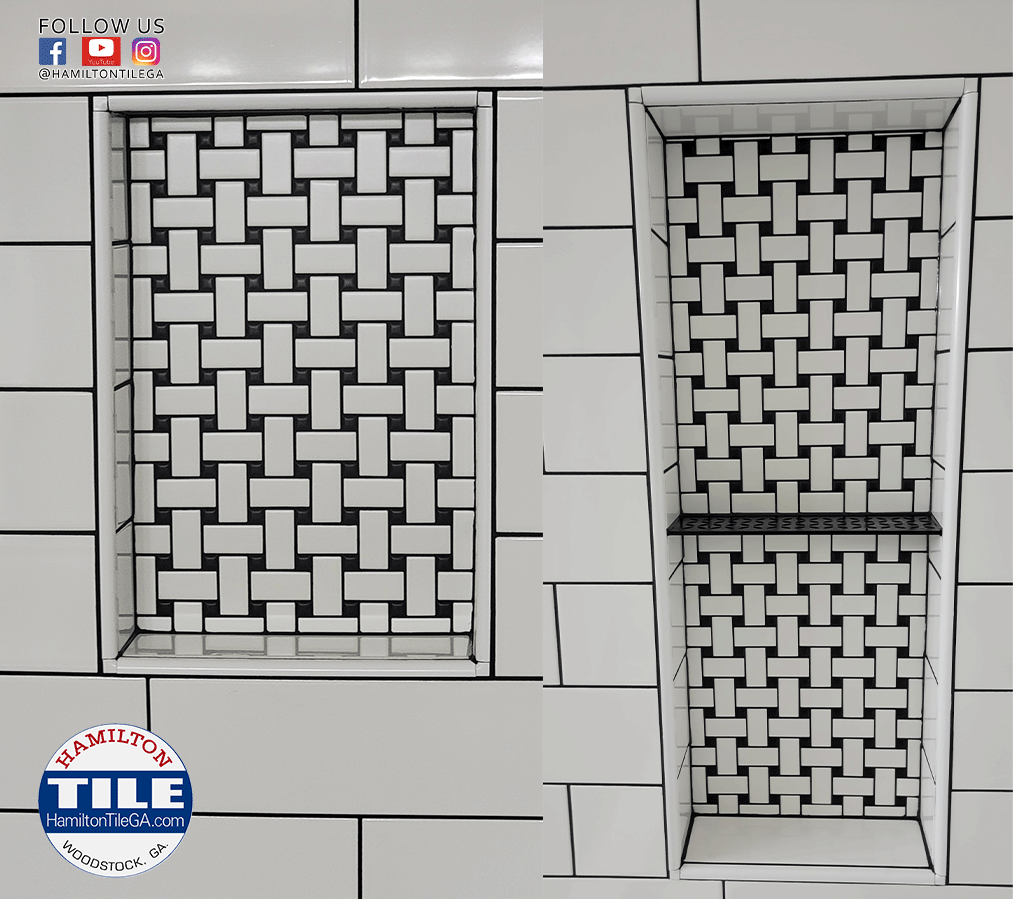
Here are some closeups of the soap niches. These are edged with Schluter Rondec profiles. In fact, the entire shower was edged with Schluter Rondec profiles. We use profiles because there are less pieces, less grout lines than when you use bullnose tile. It’s a cleaner look, don’t you think?

We used the shower floor tile to spice up the back of the boxes. The big box is 12x28” and the smaller one is 12x 20”. The big one has a black Schluter shelf down the middle. Notice FULL PIECES at the top and bottom of the boxes. We make our boxes custom to accommodate the size of the tile and to allow for bigger pieces, no “L” cuts due to good layout and planning.

These WILL FIT even the BIGGEST soap bottles you have.

The change of planes inside the boxes are silicone, and you can see on this sites how we COMPLETELY waterproof with Ardex 8+9 and Kerdi membrane.

Here we have the finished product, without the glass panel that will stop the water.

How cool is this?!

I must say, when black grout is being used GREAT CARE must be used sustaining consistent grout joint sizes or inconsistencies will be noticeable. That’s why EVERY grout line received a spacer throughout the construction of the shower. We are SUPER CONSCIENTIOUS to grout line consistency. The results were excellent when everything was grouted up.

Check out the VIDEO below:

GROUTED UP by the way, with EPOXY GROUT.

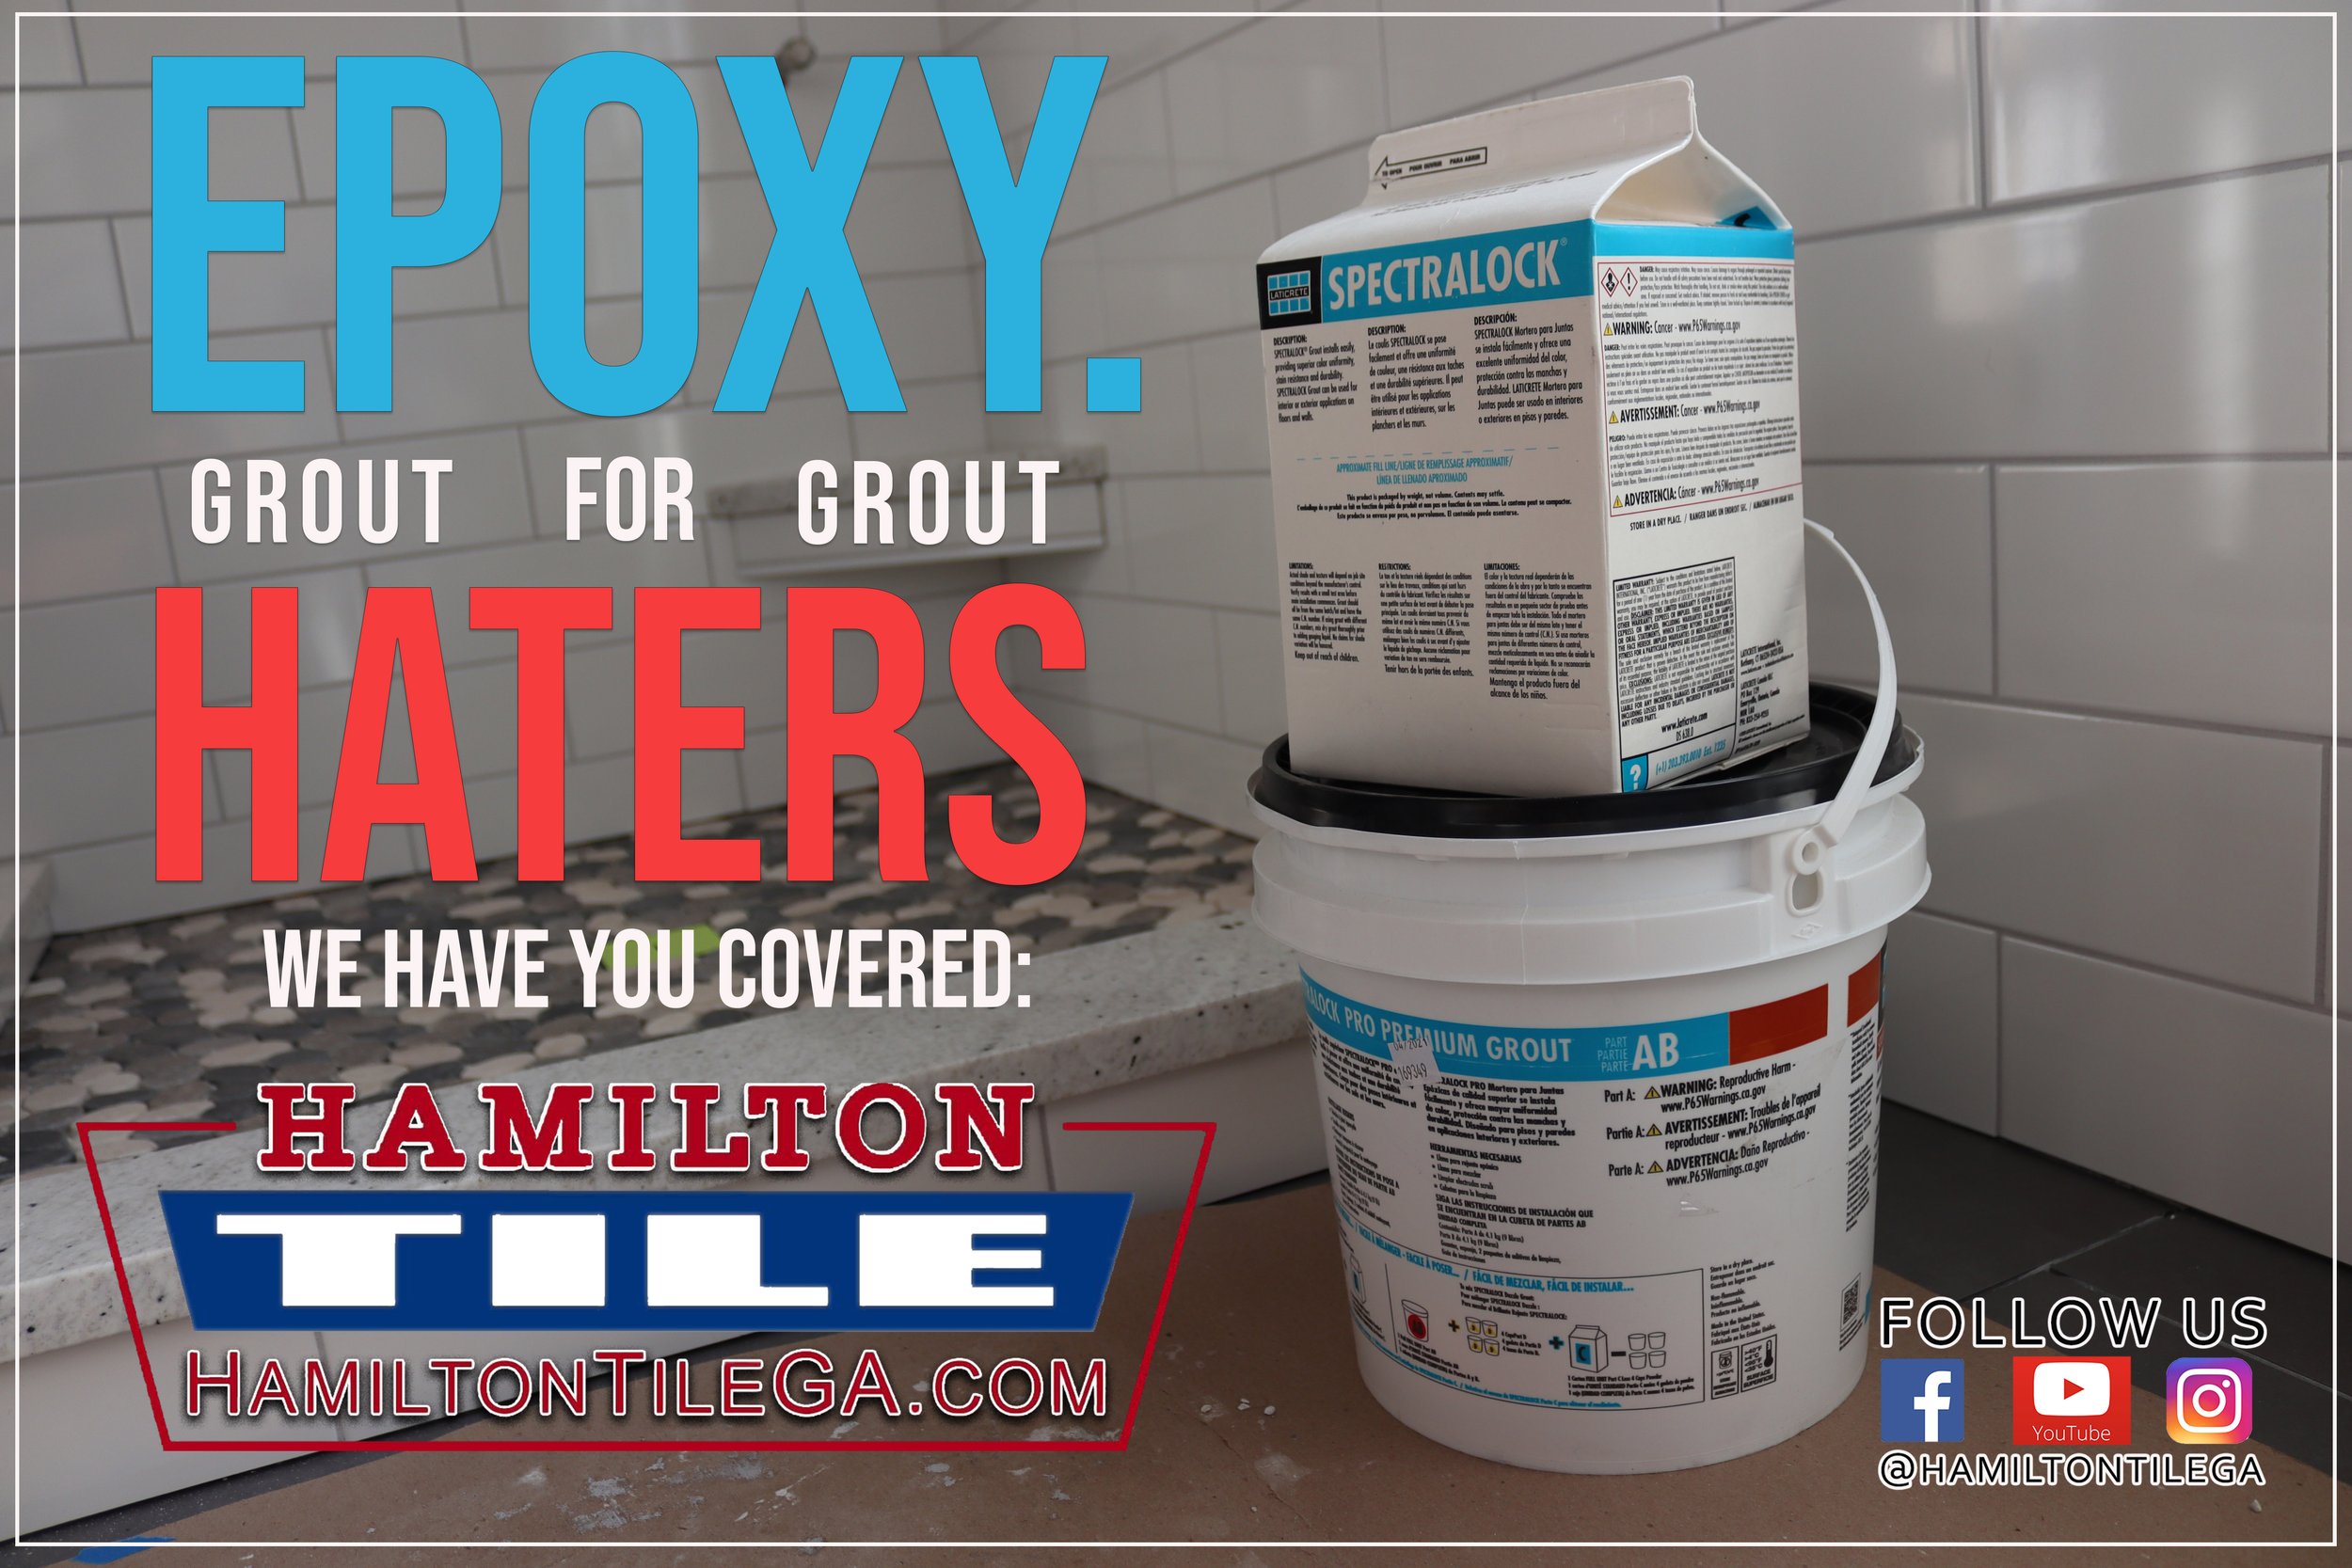
Yup, we mixed one part with another part and made true epoxy grout. Laticrete Spectra Lock Pro.

The stuff is TOUGH and it will last a very long time and you can always clean it back to it’s original color. It’s more money, but you’re NEVER messing with grout again. Many showers get the BOTTOM OF THE BARREL grout and that is why people HATE grout so much!

On an investment like this, something you use everyday, we recommend pulling the trigger for the good stuff and we have a TON of experience putting it in. It’s nothing new for us.

We try to install single piece curb tops because of how much water action the top of a curb gets. This curb top is Quartz from Top South in Marietta, GA.

My word for our business lately is GRATITUDE. We’re so grateful to be where we are and Jason and I talk about it all the time. Most days are pretty awesome for us. We relax and do what we do for great people and we’ve been getting excellent results.

I hope you can see that in this post.

We are at the top of our game professionally, we are young, motivated, skilled and barring any catastrophic unforeseens we are going to keep improving on what we do and keep bringing a great service and product to the people who choose to use us.

THANK YOU to everyone that supports us. I wish you all the best from behind my keyboard. PROSPERITY, PEACE AND JOY to all.

-Ben

© 2023 HamiltonTileGA.com

Ben here, the curator of this site. This site is here not only as an informational tool for you, but also a promotional tool for our company Hamilton Tile, LLC. Tile and bathroom remodeling is what we do for a living, it’s how we support our families. If you are in our local area and you have a project that you think we would be a good fit for, please contact us. My e-mail is Ben@HamiltonTileGA.com and our office number is 770-675-6916. We would love to display our brand of quality and service in your home. Please follow us on Instagram and Facebook @hamiltontilega . Thanks for being here. For podcast or radio interviews contact us using the contact info above. Please consider DONATING BELOW. THANKS! Just click the photo.
Tricky Glass back splash install: Atlanta, GA

Alright, all. Here’s a fun one!

This glass splash was at a home in Atlanta, GA.

It was an odd shape, so we made a template and used the template to cut and place the glass tile.

Lots of cool techniques here. Check out the short video and see how we did it!

© 2023 HamiltonTileGA.com

Ben here, the curator of this site. This site is here not only as an informational tool for you, but also a promotional tool for our company Hamilton Tile, LLC. Tile and bathroom remodeling is what we do for a living, it’s how we support our families. If you are in our local area and you have a project that you think we would be a good fit for, please contact us. My e-mail is Ben@HamiltonTileGA.com and our office number is 770-675-6916. We would love to display our brand of quality and service in your home. Please follow us on Instagram and Facebook @hamiltontilega . Thanks for being here. For podcast or radio interviews contact us using the contact info above. Please consider DONATING BELOW. THANKS! Just click the photo.

The craziest bathroom floor we've ever done!

It’s been a long journey on this project and it seems we’re finally closing in on the finish line. This one was outside of our wheelhouse in many ways, as it was a whole house remodel.

Big projects aren’t something we traditionally do because we are two people. Most don’t want to wait months for us to complete our tasks. The public doesn’t understand that on projects like this one, they don’t go quickly…adding to the unlikelihood we participate in projects like these.

But this homeowner wanted things done right, he wasn’t in a rush and our personalities meshed. We “shared values” as I always like to say. That really is my number one qualifier.

Although this project wasn’t one we would usually take on, it was intriguing because we were able to work with some of the most interesting material and exercise our mental capabilities on some of the biggest tile installation challenges:

Multiple heated floors, multiple curb-less/zero entry showers, LARGE format tile, odd shaped glass tile, mosaic tile, LOTS of self leveling, rebuilding rot, custom made to order tile, “mud” work, SPECIFIC patterns…not to mention sheet rock, additional carpentry….we generally handled everything that had to do with the areas we were working on and things the homeowner couldn’t find anyone else to do.

Jason did a lot of consulting and helped the homeowner in many ways, bring this thing to the finish line.

We aren’t quite done at this house, but it seems to be almost there.

One of the most amazing projects we took part in was this custom, hand made mosaic penny round pattern floor.

We had 3 kinds of penny round tiles: blue, purple and green. We took them apart and re-assembled them to make a Victorian style pattern. A real CLASSIC look.

We made the pattern in a separate room and moved it into the bathroom to set.

But before we could do that, we “packed” the floor with a sand mix to make sure we got the level right.

The homeowner wanted a curb-less, zero entry shower, so we had to raise the level of the floor in order to get the slope for inside the shower.

The old school method of “Packing” this floor was the perfect candidate to accomplish this.

You see, there were 2 other floors and the homeowner wanted them to be at all the same level. The difficulty was that the hard wood floors were already in.

So, Jason did the math and used his skills to make it all work. No step up or step down transitions.

Everything had to be done METHODICALLY. This doesn’t get done until this over here is done…

A curb less or zero entry shower, in this scenario, meant EVERYTHING had to be waterproof.

We also added a small curb in order to contain water that could potentially escape because the bathroom was so small that there was a door VERY close to the shower.

We waterproofed the whole room using Schluter products put together with Ardex 8+9 and then painting everything with Ardex 8+9 for good measure.

We then set the penny round pattern, moving the penny rounds (which were laid out in the other room) into the bathroom.

By the time we were done we could repeat the pattern in our SLEEP!

The best part, is we grouted this whole project (including this floor) with epoxy grout.

We did this because epoxy needs the least amount of maintenance compared to cementitious or other grouts. It’s the toughest stuff out there.

We had never done a floor like this and we are quite proud of it. I think it will really be another fascinating finish in this home. THERE ARE SO MANY HERE!

I’m so happy to be able to get so much great content out of this project. We’re thrilled to see how it’s all turning out.

This project is a testament to Jason’s skill and mastery of the tile trade. To be able to see this project from tear out to completion, that is what I’m most impressed with. For him to have the vision to see how it will all turn out, IMPRESSIVE.

As always, grateful for the opportunities, happy to help another homeowner,

CHEERS,

Ben

Jason finishing up epoxy grouting with Laticrete’s Spectra Lock Pro Premium.

Packing the floor.

An “old school” technique that still has it’s place!

Waterproofing EVERYTHING.

Notice the smooth transition to the foyer floor…A lot of planning when into that!

© 2023 HamiltonTileGA.com

Ben here, the curator of this site. This site is here not only as an informational tool for you, but also a promotional tool for our company Hamilton Tile, LLC. Tile and bathroom remodeling is what we do for a living, it’s how we support our families. If you are in our local area and you have a project that you think we would be a good fit for, please contact us. My e-mail is Ben@HamiltonTileGA.com and our office number is 770-675-6916. We would love to display our brand of quality and service in your home. Please follow us on Instagram and Facebook @hamiltontilega . Thanks for being here. For podcast or radio interviews contact us using the contact info above. Please consider DONATING BELOW. THANKS! Just click the photo.

Epoxy Grout - The ULTIMATE upgrade.

The biggest criticism homeowners have about tile is THE GROUT.

It gets dirty. It loses that "brand new" feeling very quickly.

Well, a lot of the problem is that most of the grout that is being used is from the bottom of the product totem pole.

It's the cheapest stuff that you can get. It's the most available. It's the easiest to work with.

All the major grout brands have their low end grout and that is mostly what gets used.

The solution: EPOXY.

Epoxy is made with two parts and it's the BEST upgrade you can do to your tile project. It's hard as a ROCK, it's color consistent, it's a SERIOUS upgrade.

It's GROUT for the GROUT HATER. It's one and done, it's paying now rather than paying later.

Epoxy puts the grout cleaner/restoration dudes out of business!

Consider EPOXY on your next bathroom remodel for a lasting finish that will look the same 5 years down the road, as the day we left!

Watch the video below for 3 reasons why YOU should use EPOXY GROUT!

© 2023 HamiltonTileGA.com

Ben here, the curator of this site. This site is here not only as an informational tool for you, but also a promotional tool for our company Hamilton Tile, LLC. Tile and bathroom remodeling is what we do for a living, it’s how we support our families. If you are in our local area and you have a project that you think we would be a good fit for, please contact us. My e-mail is Ben@HamiltonTileGA.com and our office number is 770-675-6916. We would love to display our brand of quality and service in your home. Please follow us on Instagram and Facebook @hamiltontilega . Thanks for being here. For podcast or radio interviews contact us using the contact info above. Please consider DONATING BELOW. THANKS! Just click the photo.

💖Your SHOWER CURB needs lovin too! #showercurb #itsthestep💖

When you work with Hamilton Tile of Woodstock, GA you can expect that WE will install all HARD SURFACES inside your shower.

We spend a lot of time and effort waterproofing and getting things perfect, we don't turn the stone installation over to someone else.

A hard surface stone company fabricates them, we cut them to size and install them.

This is a part of our quest for perfection when we are remodeling your home and you can learn more about our thought process and methods in the video below.

© 2023 HamiltonTileGA.com

Ben here, the curator of this site. This site is here not only as an informational tool for you, but also a promotional tool for our company Hamilton Tile, LLC. Tile and bathroom remodeling is what we do for a living, it’s how we support our families. If you are in our local area and you have a project that you think we would be a good fit for, please contact us. My e-mail is Ben@HamiltonTileGA.com and our office number is 770-675-6916. We would love to display our brand of quality and service in your home. Please follow us on Instagram and Facebook @hamiltontilega . Thanks for being here. For podcast or radio interviews contact us using the contact info above. Please consider DONATING BELOW. THANKS! Just click the photo.

WAYFAIR for your bathroom remodel: BIG MISTAKE!

Buying parts for your bathroom remodel from Wayfair can be a big mistake.

Especially if there are problems with the items you bought.

GETTING PARTS IS AN IMPOSSIBILITY!

The tile guy’s recommend sticking with NAME BRANDS:

MOEN

DELTA

KOHLER

Parts will be available and easy to get.

In the video below, Jason illuminates the hidden cost of WAYFAIR during your next BATHROOM REMODEL!

© 2023 HamiltonTileGA.com

Ben here, the curator of this site. This site is here not only as an informational tool for you, but also a promotional tool for our company Hamilton Tile, LLC. Tile and bathroom remodeling is what we do for a living, it’s how we support our families. If you are in our local area and you have a project that you think we would be a good fit for, please contact us. My e-mail is Ben@HamiltonTileGA.com and our office number is 770-675-6916. We would love to display our brand of quality and service in your home. Please follow us on Instagram and Facebook @hamiltontilega . Thanks for being here. For podcast or radio interviews contact us using the contact info above. Please consider DONATING BELOW. THANKS! Just click the photo.

Wall Art 3d Decor Panels

These Wall Art 3d Decor panels are pretty neat!

Can’t wait to seem them painted and with the rest of the decor!

Try them out in your home for a bold statement!

© 2023 HamiltonTileGA.com

Ben here, the curator of this site. This site is here not only as an informational tool for you, but also a promotional tool for our company Hamilton Tile, LLC. Tile and bathroom remodeling is what we do for a living, it’s how we support our families. If you are in our local area and you have a project that you think we would be a good fit for, please contact us. My e-mail is Ben@HamiltonTileGA.com and our office number is 770-675-6916. We would love to display our brand of quality and service in your home. Please follow us on Instagram and Facebook @hamiltontilega . Thanks for being here. For podcast or radio interviews contact us using the contact info above. Please consider DONATING BELOW. THANKS! Just click the photo.

Do you even SILICONE, bro?!🤷‍♂️

SILICONE.

Most tile installers DON’T DO IT.

Look around.

I rarely see tile work in the wild that has silicone. I’ve never seen silicone used on the failed showers we inspect. I’ve never seen silicone used on a builder job, ever.

Silicone is not generally used by most tile installers.

But it is VERY important

Hard grouted corners everywhere, that’s why you see the UNSIGHTLY CRACKS.

Here’s the kicker:

IT’S INDUSTRY STANDARD TO USE SILICONE SEALANT IN ALL WET AREAS!

The TCNA Handbook (Tile Council of North America) Section EJ171:

“All changes of plane to be filled with silicone sealant to allow for movement in the assembly. “

So, if your tile installer doesn’t silicone, THEY ARE DOING IT WRONG!

And it’s not just something we follow because the book told us so. It’s actually the best way! It lasts a long time, it stays clean longer and it is also easier to clean. It’s good stuff!

My installer test question is, “Do you silicone your showers?” It’s the one of the two questions I need to tell immediately if someone is LEGIT.

EVERY WALL MOVES. Because of this we install soft joints to allow for that small amount of movement. When you use grout in corners, between the walls and floor or any change of plane, that leaves a potential for cracks because grout is HARD and doesn’t let the wall move. Two immovable objects. I’m sure you see where I’m going here.

Now, hate to be a stickler but not everything in a tube is SILICONE.

Caulking is not silicone. Caulking is for PAINTING.

A tube of silicone states “100% silicone” not siliconized and it certainly isn’t labeled “latex”.

The great thing, is the grout makers produce a COLOR MATCH silicone. Meaning: your silicone will match the grout.

Try siliconing yourself if you’re a homeowner!

I show anyone I can how to silicone because it’s something good to know.

It’s like tying a bowline knot, once you know, you use it all the time!

Just go to YouTube or Google and type in, “How to silicone your shower”.

Once you get it you won’t go back!

“DO YOU EVEN SILICONE BRO?!”

© 2023 HamiltonTileGA.com

Ben here, the curator of this site. This site is here not only as an informational tool for you, but also a promotional tool for our company Hamilton Tile, LLC. Tile and bathroom remodeling is what we do for a living, it’s how we support our families. If you are in our local area and you have a project that you think we would be a good fit for, please contact us. My e-mail is Ben@HamiltonTileGA.com and our office number is 770-675-6916. We would love to display our brand of quality and service in your home. Please follow us on Instagram and Facebook @hamiltontilega . Thanks for being here. For podcast or radio interviews contact us using the contact info above. Please consider DONATING BELOW. THANKS! Just click the photo.

Grab bars: An ESSENTIAL part of your tile shower.

Grab bars are an essential part of your tile shower plan.

Even if you don’t need them, you could.

Let’s talk about grab bars early and install blocking just in case.

What is blocking?

It’s wood that is attached to the inside of the stud bay BEHIND the tile, that gives the grab bar something sturdy to be attached to. If it was just attached to the tile it would fly off the wall when you have that “OH NO” moment.

Blocking goes in at the beginning of the shower build. Within the first couple days after demolition. We have the wall open, now’s a good time to get some blocking in.

Let’s talk about this early and nail down this detail.

Installing blocking is the part of a shower build when the tile guy becomes more than just a tile guy.

We become carpenters.

It’s fun to use so many skills in my trade.

If you’re wanting a grab bar (or 5) in your shower, how does that work? How do I choose one?

Pretty easy: Make a selection online, show us and we’ll make sure we get it. Stop by a show room or Home Depot and lay hands on what you like, also!

Plan for the extra expense. Could be as much as an extra four digits. $$.

I also mention, grab bars don’t have to look ugly either…A lot of the new fangled grab bars are down right STYLISH.

20200317_141104-1.png

We recommend your grab bars be installed horizontally (or parallel to the shower floor.) The ADA also recommends the same. If you’re flailing during a fall, it’s been shown having the grab bars in this configuration is most effective.

With envelope cut shower pans, for example, a grab bar might come in handy due to a more slippery situation.

What about adding GRAB BARS AFTER THE FACT? You have an existing shower and you want to ADD grab bars. For an elderly parent, you’re newly disabled…you have a hitch in your gitty up and you want to add a grab bar to your EXISTING shower….how can you do it?

This is a tough one because you need the blocking in the wall…How do you install the blocking after a shower is completely done and in existence for many years? You need something SOLID to drop the screws into that holds the grab bar.

I’ve seen some use epoxy to attach the grab bar. I had one person show me his grab bar that he installed with epoxy, he said, “look how strong it is”…He put his body weight on it, AND IT CAME OFF THE WALL!

To me, epoxy is not the solution. You need the grab bars to be attached with a fastener.

Another option is toggle fasteners, like the one shown below:

I tend to think this is the BEST of all the BAD options.

Here’s the problem with toggle fasteners (or something similar) NO ONE HAS X RAY VISION. You don’t know what’s in the wall that you will screw into. There could be pipes in the wall, there could be heating and cooling ducts, I’ve seen all sorts of stuff in walls behind showers!

You drill a hole through the tile, WHOOPS there’s something in the way…Now you have a HOLE in your shower.

I don’t believe there is any good way to attach grab bars once a shower is built without blocking for a screw to bite into! Maybe you can educate me if you’ve discovered a way, that has a surefire success rate!

Comment below!

Even if you’re young and mobile, think about putting in grab bars. It’s simply a good insurance policy. Thank me when you’re falling in your shower! My email is protile85@gmail.com :P

Now, if you actually NEED grab bars, we’ll load you up with some SOLID options and make your shower the SAFEST and SECUREST spot in the house!

Ben here, signing out.

Thanks for reading and sharing!

It’s Ben from Hamilton Tile signing out!

It’s Ben from Hamilton Tile signing out!

© 2023 HamiltonTileGA.com

Ben here, the curator of this site. This site is here not only as an informational tool for you, but also a promotional tool for our company Hamilton Tile, LLC. Tile and bathroom remodeling is what we do for a living, it’s how we support our families. If you are in our local area and you have a project that you think we would be a good fit for, please contact us. My e-mail is Ben@HamiltonTileGA.com and our office number is 770-675-6916. We would love to display our brand of quality and service in your home. Please follow us on Instagram and Facebook @hamiltontilega . Thanks for being here. For podcast or radio interviews contact us using the contact info above. Please consider DONATING BELOW. THANKS! Just click the photo.

Why do tile floors NEED expansion joints?

Expansion joints are the most often ignored part of tile floors.

They are EXTREMELY important to the overall LONGEVITY of your tile floor.

Your floor absolutely NEEDS them!

Expansion joints can be a grout line in the tile pattern that is kept a SOFT JOINT in order to allow for small amounts of movement UNDER the tile and help prevent CRACKS from showing up on the tile floor.

Watch the video below to learn more and MAKE SURE you allow for EXPANSION and CONTRACTION when building with TILE (or any material for that matter!)

© 2023 HamiltonTileGA.com

Ben here, the curator of this site. This site is here not only as an informational tool for you, but also a promotional tool for our company Hamilton Tile, LLC. Tile and bathroom remodeling is what we do for a living, it’s how we support our families. If you are in our local area and you have a project that you think we would be a good fit for, please contact us. My e-mail is Ben@HamiltonTileGA.com and our office number is 770-675-6916. We would love to display our brand of quality and service in your home. Please follow us on Instagram and Facebook @hamiltontilega . Thanks for being here. For podcast or radio interviews contact us using the contact info above. Please consider DONATING BELOW. THANKS! Just click the photo.

4 things you should look for in a TILER.

loveyourtiler.png

It’s really hard to find good tilers.

There are a lot of reasons…

For starters, it’s hard work. We get worn out, We’re expected to push it really hard.

We have to be really smart. There’s a lot to think of, we have to be able to put together very complex projects and know a lot about many different things.

I could go on and on, but the point is…If you want someone in your house you can depend on to do a great job, you’ll have to do a pretty fast character read.

You’ll have to use your intuition and your gut to make a decision.

So, what should you look for?

I’m in the field, I see and feel the climate of construction, I know people, so I may have some insight here.

Let’s check out a few things to look out for when hiring a tiler:

1.       Do they talk about the process, how it’s built…Do they GEEK out about what they DO? Do they understand the mechanics of working with tile?

If I’m having someone work at my house, I want them to geek out on what they are doing. I want to know that I have the most competent technician out there that’s “into it”.

It’s a good sign if your tiler is really into what they do.

Very important and added points if they’re into what’s BEHIND the tile…If your tiler starts speaking quickly and in words you don’t understand about their waterproofing or what products they use…PAY WHATEVER.

The stuff underneath your tile is just as important as the tile itself. If that sounds weird to you, don’t get tile until you spend some time looking into what I mean.

2.       Will they try their BEST?

Maybe just ask them that.

 I don’t care if someone has done tile for 15 years, if the person will take shortcuts when they’re not “feeling it” you don’t want them around.

They have to try when it’s cold, try when they’re hungry, try when Mama died, try at ALL TIMES.

What I mean is, if they have a bad cut, but they’re a little upset about a flat tire, WILL THEY LEAVE IT?

A great tile installer will ALWAYS TRY THEIR BEST. No matter the circumstances. A great installer cares!

3.       Does this person have any CONTENT?!

You have to do your research. I’m not talking about checking for reviews or insurance or any of that surface stuff.

I’m talking about spending time on the social media or website and being able to get a good overall look at HOW things are done.

HOW will your project be built? Do they cover things before they work? Who’s doing the work? Does that person talk on film and show what they are doing, day to day.

It’s super important with a  tiler because everyone does things differently.

I’d say the most important part you’re trying to find out from the content:

DOES THE TILER FILM THEMSELF OR TAKE PICTURES?

Are they proud of the cleanliness of their job site? Do they like how they did that one cut?

What does their finished walk through look like?

Any company you hire should have a DIGITAL FOOTPRINT. They’re not afraid to make public what they DO!

IT MATTERS to see and know what you’re going to get with your own two eyes.

Finished photos and legends shouldn’t be enough. Watch the actions.

Maybe better, a job walk.

4.       So, you’re a tiler…will we get along?

You’ll be spending a ton of time withy our tiler working in your house, maybe even right near your bedroom.

Do you all get along? Do you share similar values? Would you let this person use your bathroom?

Anytime you have ever dealt with anyone, it’s gone a lot better if you get along.

Do that, but with your tiler.

4 SIMPLE things! But dig deep, ask the hard questions, spend a little time.

Remember, you’re looking for a personality type, when it comes to tile. You’re not buying the tile job, you’re buying the person DOING the tile job.

© 2023 HamiltonTileGA.com

Ben here, the curator of this site. This site is here not only as an informational tool for you, but also a promotional tool for our company Hamilton Tile, LLC. Tile and bathroom remodeling is what we do for a living, it’s how we support our families. If you are in our local area and you have a project that you think we would be a good fit for, please contact us. My e-mail is Ben@HamiltonTileGA.com and our office number is 770-675-6916. We would love to display our brand of quality and service in your home. Please follow us on Instagram and Facebook @hamiltontilega . Thanks for being here. For podcast or radio interviews contact us using the contact info above. Please consider DONATING BELOW. THANKS! Just click the photo.

🧺Tiled washing machine pan with drain: SUH-MART!🤓

showerpanphoto.jpg

That one major flood can really be a pain and can cost you a lot of money.

We worked for a builder named Leon who always had us put in water proof tile pans underneath his clients washer and dryer.

It’s a brilliant idea and we’ve adopted it as our own.

Our prevention minded clients always appreciate this home improvement recommendation.

They understand that a washer is bound to leak eventually

Let’s be real, those plastic pans under your washer aren’t going to do SQUAT if your washer EXPLODES.

No one has the time for a major flood…prevent it with this great home improvement idea!

The video below shows exactly how we build these and why they are such a time and money saver.

We did it again! Check out the short video below!

© 2023 HamiltonTileGA.com

Ben here, the curator of this site. This site is here not only as an informational tool for you, but also a promotional tool for our company Hamilton Tile, LLC. Tile and bathroom remodeling is what we do for a living, it’s how we support our families. If you are in our local area and you have a project that you think we would be a good fit for, please contact us. My e-mail is Ben@HamiltonTileGA.com and our office number is 770-675-6916. We would love to display our brand of quality and service in your home. Please follow us on Instagram and Facebook @hamiltontilega . Thanks for being here. For podcast or radio interviews contact us using the contact info above. Please consider DONATING BELOW. THANKS! Just click the photo.

Residential tile inspection and diagnostics: Atlanta, GA.

Untitled-1.jpg

When you’re buying a new house, you check out all the big ticket items: HVAC, check. Plumbing, check. Foundation, check.

But for some reason, the awful tile work, the leaky shower is ignored!

You would think the home inspector or code enforcement would flag bad tile work.

The reality is:

THEY KNOW VERY LITTLE ABOUT TILE and it can cost you big MONEY!

That’s where we come in:

We are the tile inspectors you need in Atlanta, GA.

We are the pros. We are the experts. Tile is what we do. Tile is what we live. Tile is our primary field of study and expertise.

So, you’re buying a new house?

Our tile inspection service will save you a lot of MONEY and HEADACHES when you’re buying a house.

If you’re looking at a house with bad tile work, poor craftsmanship, showers with the potential to leak:

WE WILL TELL YOU BEFORE THE BIG INVESTMENT.

You can use the information as you will; to either pass on the purchase or have the price reduced.

Check out this informative article about the DANGERS of “newly remodeled” homes.


You own a home and you had the bathroom remodeled. A new tile shower, new floors. It’s all done, you turn on the water in the new shower, and it leaks! WHAT NOW?!

You just had tile work done and you notice the craftsmanship is SUSPECT. Cracked tile, chipped edges, excessive lippage….

Our tile inspection service will get a bad builder to fix the work or give you your money back!

Often time, when you present the builder or tile installer with your complaints they simply say, “It’s supposed to be like that!” and they treat you like a dumb homeowner.

That’s when you need a real professional to come in and set things right.

Here is an example of our inspection service video.

Watch it.

When a builder or tile installer gets a video like that from a highly credentialed, expert installer…his attitude will change.


The builder is shady, he leaves you with bad tile work…

Our tile inspection service may help you in your legal battle!

Why is our tile inspection service so EFFECTIVE?

How have we had success getting full replacements for our clients or refunds?

Our inspections are IRREFUTABLE!

Our tile inspection service includes:

A one hour meeting with certified tile installers, with over 30 years of experience and a wide knowledge of tile installation standards and building codes.

A high definition VIDEO where we address the problems with your shower. It’s one thing when you as a homeowner present the builder with complaints, it’s a TOTALLY different scenario when a professional tile installer addresses the builder with FACTS and OBJECTIVE explanations citing industry, manufacturer and national standards.

AND MOST IMPORTANTLY:

You will receive a document stating ANSI (American National Standards Institute) and TCNA (Tile Council of North America) standards as well as local plumbing codes and manufacturer standards that were ignored during your project.

There are standards with tile. There is a RIGHT and a WRONG way to install it. The national and manufacturer standards and local codes are the end all be all in a dispute.

tileinspection-includes.jpg

We will help you gain CLOSURE, possibly full replacement of the shoddy work or your money back.

In some cases our service may help you win, legally.

Our tile inspection service makes us your ally. We will be in your corner. People who know what they are talking about and know what they are looking at. We are the EXPERTS you need.

You’re not happy with your tile work?

You’re not just seeing things!

Unfortunately, builders regularly get away with bad craftsmanship and doing things incorrectly.

We want to help make this stop.

But it takes a commitment from you:

For only $1500 we will be your trusted advisors and allies.

We are wiling to travel the greater Atlanta area to provide a thorough assessment of tile work in your potential new home or recent remodel.

Call 770-675-6916 or fill our our inquiry form at the “CONTACTS” tab.

We are EXPERTS at presenting a case that will get you full replacement or a refund.

What are our residential bad tile inspection videos all about?

CHECK IT OUT BELOW!

© 2023 HamiltonTileGA.com

Ben here, the curator of this site. This site is here not only as an informational tool for you, but also a promotional tool for our company Hamilton Tile, LLC. Tile and bathroom remodeling is what we do for a living, it’s how we support our families. If you are in our local area and you have a project that you think we would be a good fit for, please contact us. My e-mail is Ben@HamiltonTileGA.com and our office number is 770-675-6916. We would love to display our brand of quality and service in your home. Please follow us on Instagram and Facebook @hamiltontilega . Thanks for being here. For podcast or radio interviews contact us using the contact info above. Please consider DONATING BELOW. THANKS! Just click the photo.

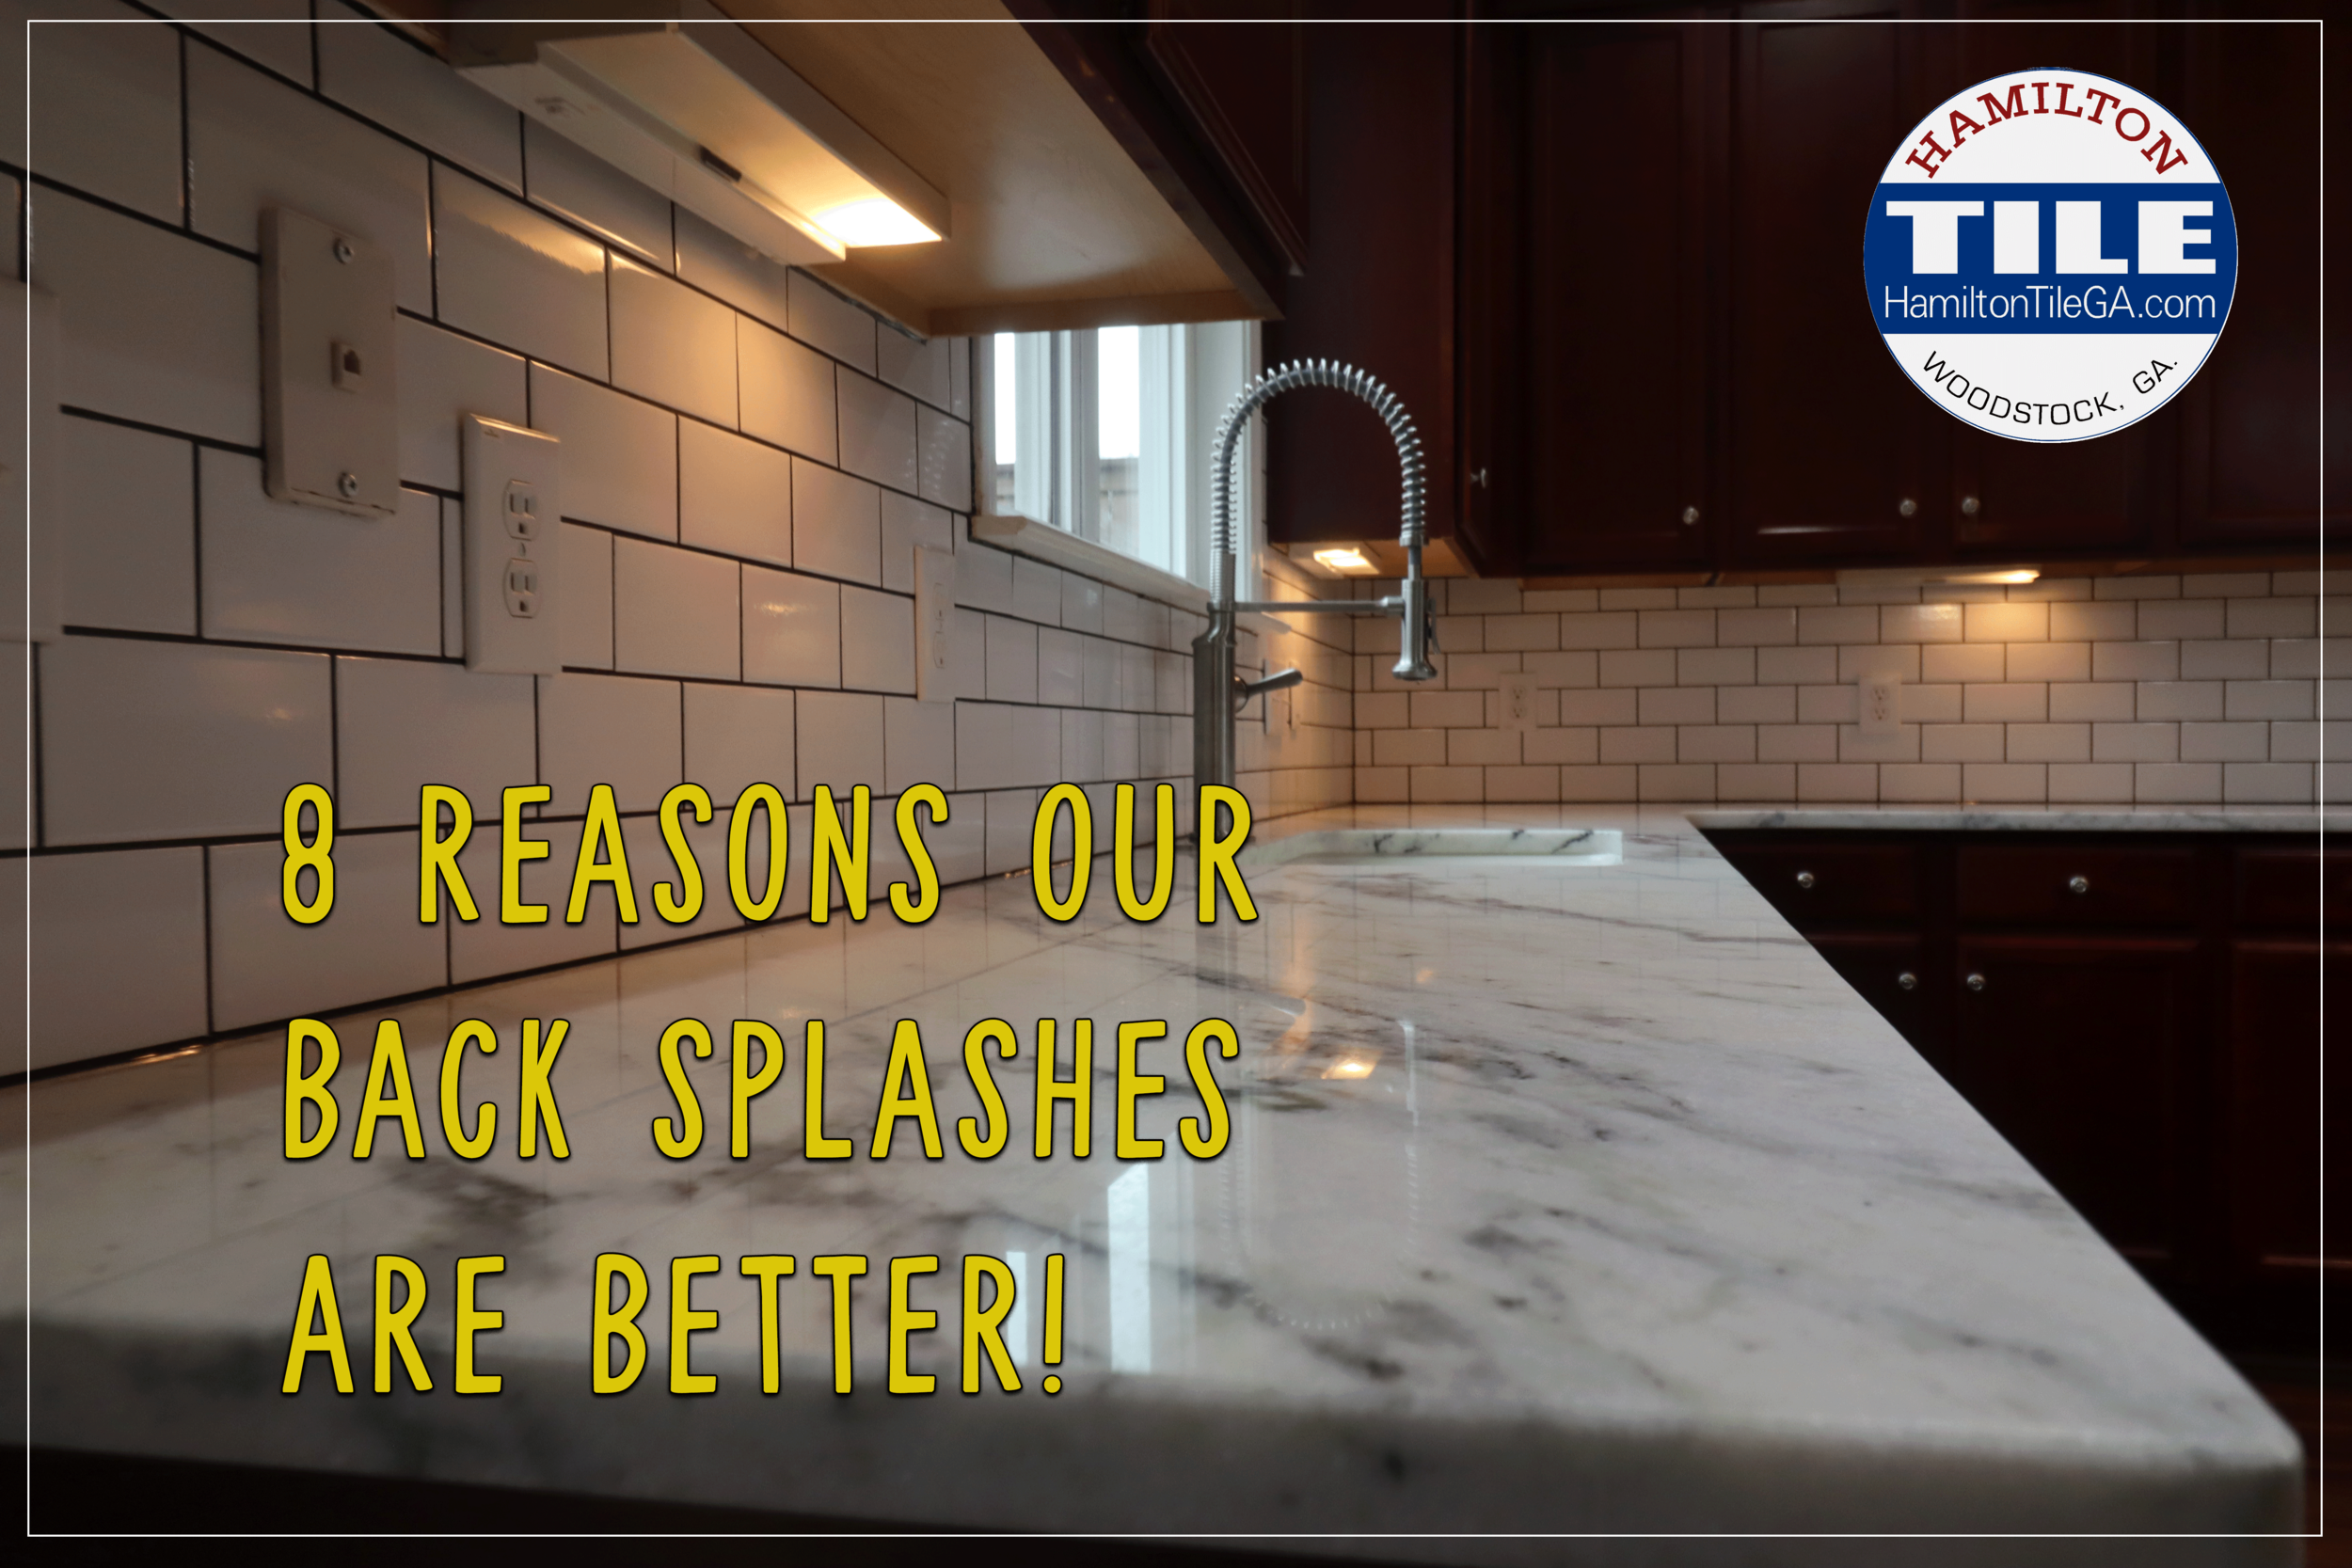
8 reasons our back splashes are BETTER.

It’s a fact! We can prove it!

It’s a fact! We can prove it!

I receive many calls every month for kitchen back splash remodels.

Especially in the Greater Atlanta area because there is a lot of remodeling going on!

Homeowners find us online and they see something they like. They get our number from a neighbor.

These are folks who care about HOW your project is built and they want people who understand the SERVICE side of remodeling.

BUT:

Many homeowners are shocked by what a back splash costs to install. Why do our creations often cost double the “handyman” or the “builder”.

It’s because we are BETTER and I can show you how!

What are you paying more for when you hire Hamilton Tile to take on your new kitchen back splash?

It’s TANGIBLE, EVIDENT, OBVIOUS. Allow me to explain:

Give me the EASY button...

SMACK IT!!!!

Here are 8 reasons our back splashes are BETTER.

  1. We use backer board meant for TILE.

    If you’re serious about tile, you use products meant for tile.

    Sheet rock works, but not as well. Therefore, we use tile specific backer boards.

    Tile makes a better bond to tile specific backer boards and our backer boards are water proof. Kitchen areas can get WET. Waterproof therefore is BETTER.

    They reduce inconsistencies on the substrate and also do not require mud, tape or paint, thus eliminating multiple steps.

    Our backer boards also reduce the DUST in your house because they are foam based. There is less grit which may scratch your appliances or floors because they are not CEMENT based.

    We use tile specific boards like Ardex board, GoBoard, Kerdi Board, Wedi board or Durel board.

    Look them up online, they are great tile installation products.

    All of which are SUPERIOR to sheet rock and cement board.

IMG_1270-1.png

2. We tile with the SHORT and CURIOUS in mind.

In the corner of a back splash, two cabinets come together and there is a void behind the cabinets in the corner.

If you look straight on, (first picture) no big deal, all you see is back splash.

If you are short or if you look up into the corner, the vast majority of installers WILL NOT continue the back splash up the wall.

Yeah, mostly no one looks up there, BUT WHAT IF THEY DO?!

We have been installing a couple rows up the wall into the void, behind the cabinets, for quite some time now for short people, for curious people...

It's all in the details like this!

A THOROUGH JOB. A complete job.

Look around, you’ll see naked walls in the corners where cabinets meet EVERYWHERE. It’s rare that an installer does what we do!

a.png
a2.png

3. We tile one row below the counter top behind stoves.

Behind the stove...we go one row BELOW the counter top so you see TILE when you look.

Behind a stove without the additional row of tile, guess what, you see a painted wall and NOT the back splash that you paid for.

We’re not trying to check a credential box or say, “We’ve been at this for 30 years!”

We want to be BETTER than ourselves, which in turn brings us above much of the competition!

This is another way that we accomplish that!

a3.png

4. We FIX YOUR WALLS before we set tile.

The reason that a lot of tile work is wavy, wonky, SI-GOGGLIN, messed up, horrible looking, is because the prep isn’t done.

You don’t put good tile on a bad wall because the tile won’t look right.

You don’t “fix it with thin set”, you fix the walls FIRST…make them flat and in plane…THEN you install the tile.

If you have studs that aren’t in plane, that will transfer out to the tile.

The MOST DIFFICULT PART on any back splash with a tear out is getting the walls back to an acceptable state for tile installation.

Setting the tile is not the true skill. Fixing the walls in anticipation for tile is.

Granite installers leaving a 1/4” gap between the counters and the backer board. There is NO WAY tile will cover a gap like that! So, we shim out the wall to solve the problem.

Granite installers leaving a 1/4” gap between the counters and the backer board. There is NO WAY tile will cover a gap like that! So, we shim out the wall to solve the problem.

We put a straight edge on the studs to make sure they are all in plane, with no dips and dives. Any irregularities we build out with drywall shims stapled to the wall. We then put backer board on for a flatter tile installation.

We put a straight edge on the studs to make sure they are all in plane, with no dips and dives. Any irregularities we build out with drywall shims stapled to the wall. We then put backer board on for a flatter tile installation.

5. We bring our AIR CLEANER during your demolition!

On more than one occasion, after the tear out of an old back splash, the homeowner has informed us that they were so happy and pleased with how we treated their house. How thoroughly we cleaned up, how neat and organized we are.

This happens because people are used to contractors treating their house like a dumpster.

It’s very common.

Don’t be shocked when we work at your house. We will keep it cleaner, more organized, neater, with less dust spreading than any other company.

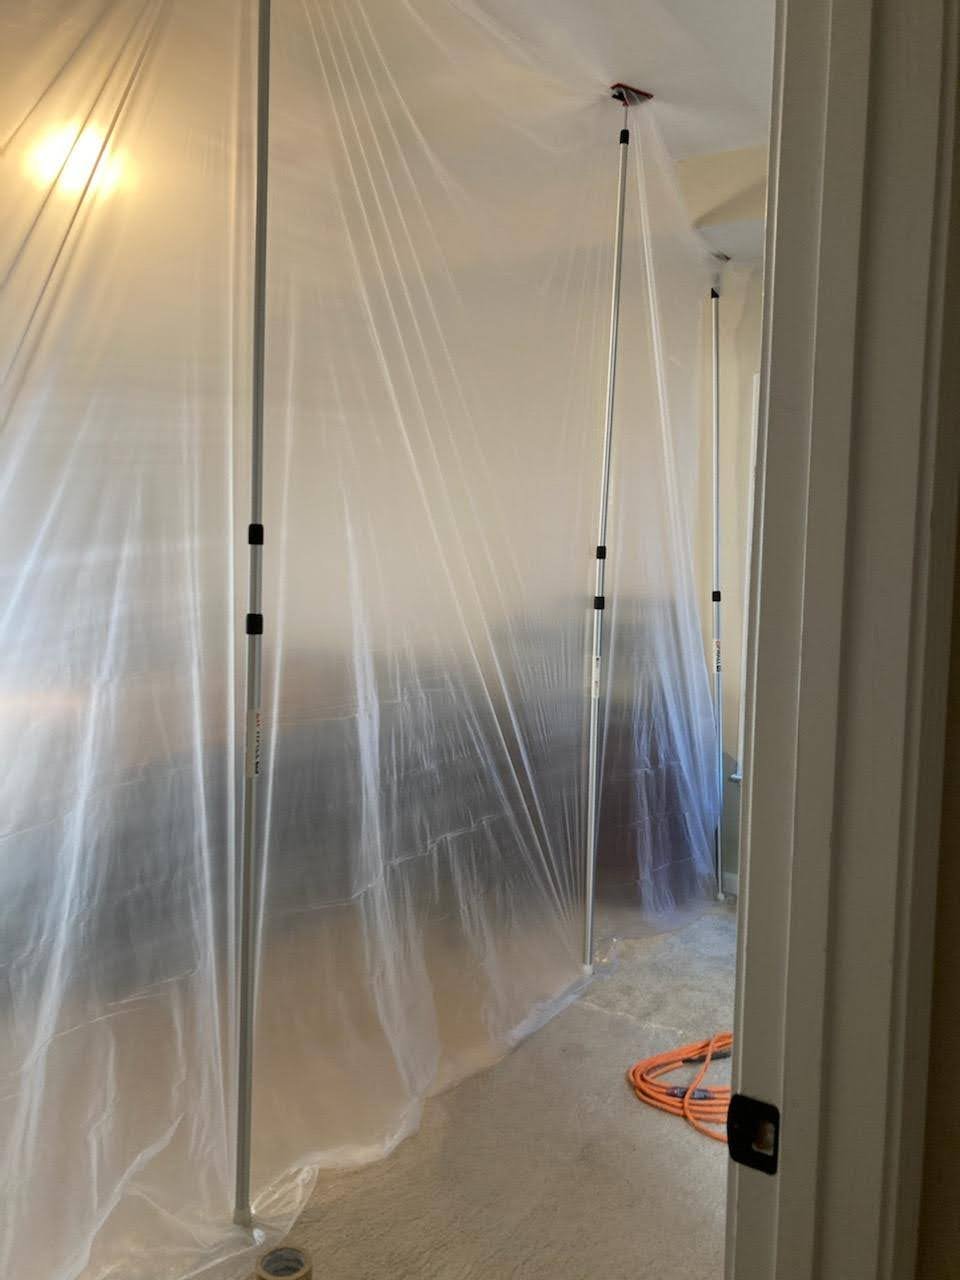
We use a lot of time and effort to make sure your property is protected. I talk about it and show pictures and video of it a lot on this website.

A Build Clean air scrubber, temporary walls, Hepa vacuums, micro fiber dusting, cardboard on floors/counters/appliances…extreme care, conscientiousness, remodeling to a high standard…

You deserve that at YOUR home because it’s not OURS. It’s YOURS.

aircleaner.png

6. We FINISH our edges. No rough, chipped tile edges!

The sure sign of an amateur or someone who simply doesn’t care are CHIPPED, UNFINISHED tile edges.

It’s the look from an installer who makes a cut on the saw, blows out the edges…and just throws the tile up on the wall without sanding or finishing.

I see it everywhere.

Smoothing tile edges is as simple as taking sand paper or an edge block and lightly giving the tile edge a touch, anywhere that a cut edge is going to be visible to the naked eye.

THAT is a tangible difference between us and the vast majority of other installers.

Rough, Jagged edges are a TRAVESTY and cannot be fixed once they are installed. They will annoy you every time you look, if you’re that type of person.

Another no-no is a tile edge without bullnose, a profile or pencil. The old “NAKED EDGE” . SO many houses have it.

PLAN OUT your edging prior to putting in tile.

When a wall with tile ends and doesn’t terminate into a cabinet or another wall, there has to be some sort of edging.

When you work with Hamilton Tile, that kind of detail is covered. We have the experience and care that you need to get a tremendous finished back splash.

cuttile3.jpg
IMG_0992-1.png

7. We use high quality grouts.

The logic behind this one is quite easy. You’re buying a permanent, functional finish…Why would you buy cheap, garbage grout?

Grout is a major part of your installation and we don’t cheap out!

We use good grout because we want to make your back splash LIFE proof. Spaghetti sauces, over spray, all sorts of kitchen mess happens and a good quality grout will look great longer, with much less maintenance.

Grouts like Cusom’s Prizm grout, Mapei’s Flexcolor or the creme de le creme Ardex’s EPOXY WA. Spectralock PRO PREMIUM.

THAT’S what QUALITY MEANS TO US. QUALITY in PRACTICE with real MEANING behind it.

IMG_0216.JPG

8. We silicone all plane changes. No cracked GROUT!

You’ve seen the cracked grout in corners and plane changes. In particular, on a back splash, where the tile meets the counter top, most will just grout that tight.

WRONG.

Some people use cheap, latex or “siliconized” caulking.

Not wrong, but not the same as what we do.

That stuff does not LAST. It will crack much like grout will crack in a corner because it is not as flexible as it needs to be.

I believe a lot of that is because water is used to form the joint.

Latex caulking also gets DIRTY much easier and is no where near as CLEANABLE as what we use.

We use 100% REAL SILICONE, which lasts longer, looks better and requires less MAINTENANCE.

We use silicone because it is a superior finished product. Walls move, houses move because wood expands and contracts. A basic rule of construction. When plane changes are grouted tight, there is no room for movement, so the grout or the cheap latex caulking cracks.

Silicone is a super flexible joint which allows for more movement.

caulking-graphic.jpg

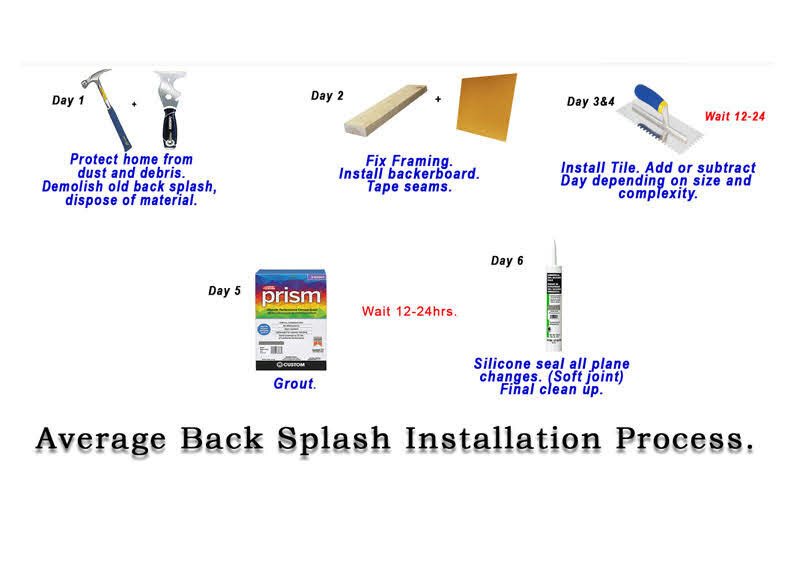
Here is a basic graphic of what our back splash process works out to be.

On average, 3-5 days labor for any back splash.

backsplash.jpg

We want to give our customers more than average on every project.

Sometimes it’s things that no one sees, but our care is still present.

AS ALWAYS:

It’s what is UNDER the tile, the 25 DETAILS added up that make all the difference!

You ultimately see all the little things at the end of the project and also 10 years down the road when your tile remodel still looks incredible and functions the way it should.

We want to bring our level of care and detail orientation to YOUR home. Call us RIGHT NOW for your flawless tile back splash. WE ARE #WAYABOVESTANDARD!

© 2023 HamiltonTileGA.com

Ben here, the curator of this site. This site is here not only as an informational tool for you, but also a promotional tool for our company Hamilton Tile, LLC. Tile and bathroom remodeling is what we do for a living, it’s how we support our families. If you are in our local area and you have a project that you think we would be a good fit for, please contact us. My e-mail is Ben@HamiltonTileGA.com and our office number is 770-675-6916. We would love to display our brand of quality and service in your home. Please follow us on Instagram and Facebook @hamiltontilega . Thanks for being here. For podcast or radio interviews contact us using the contact info above. Please consider DONATING BELOW. THANKS! Just click the photo.

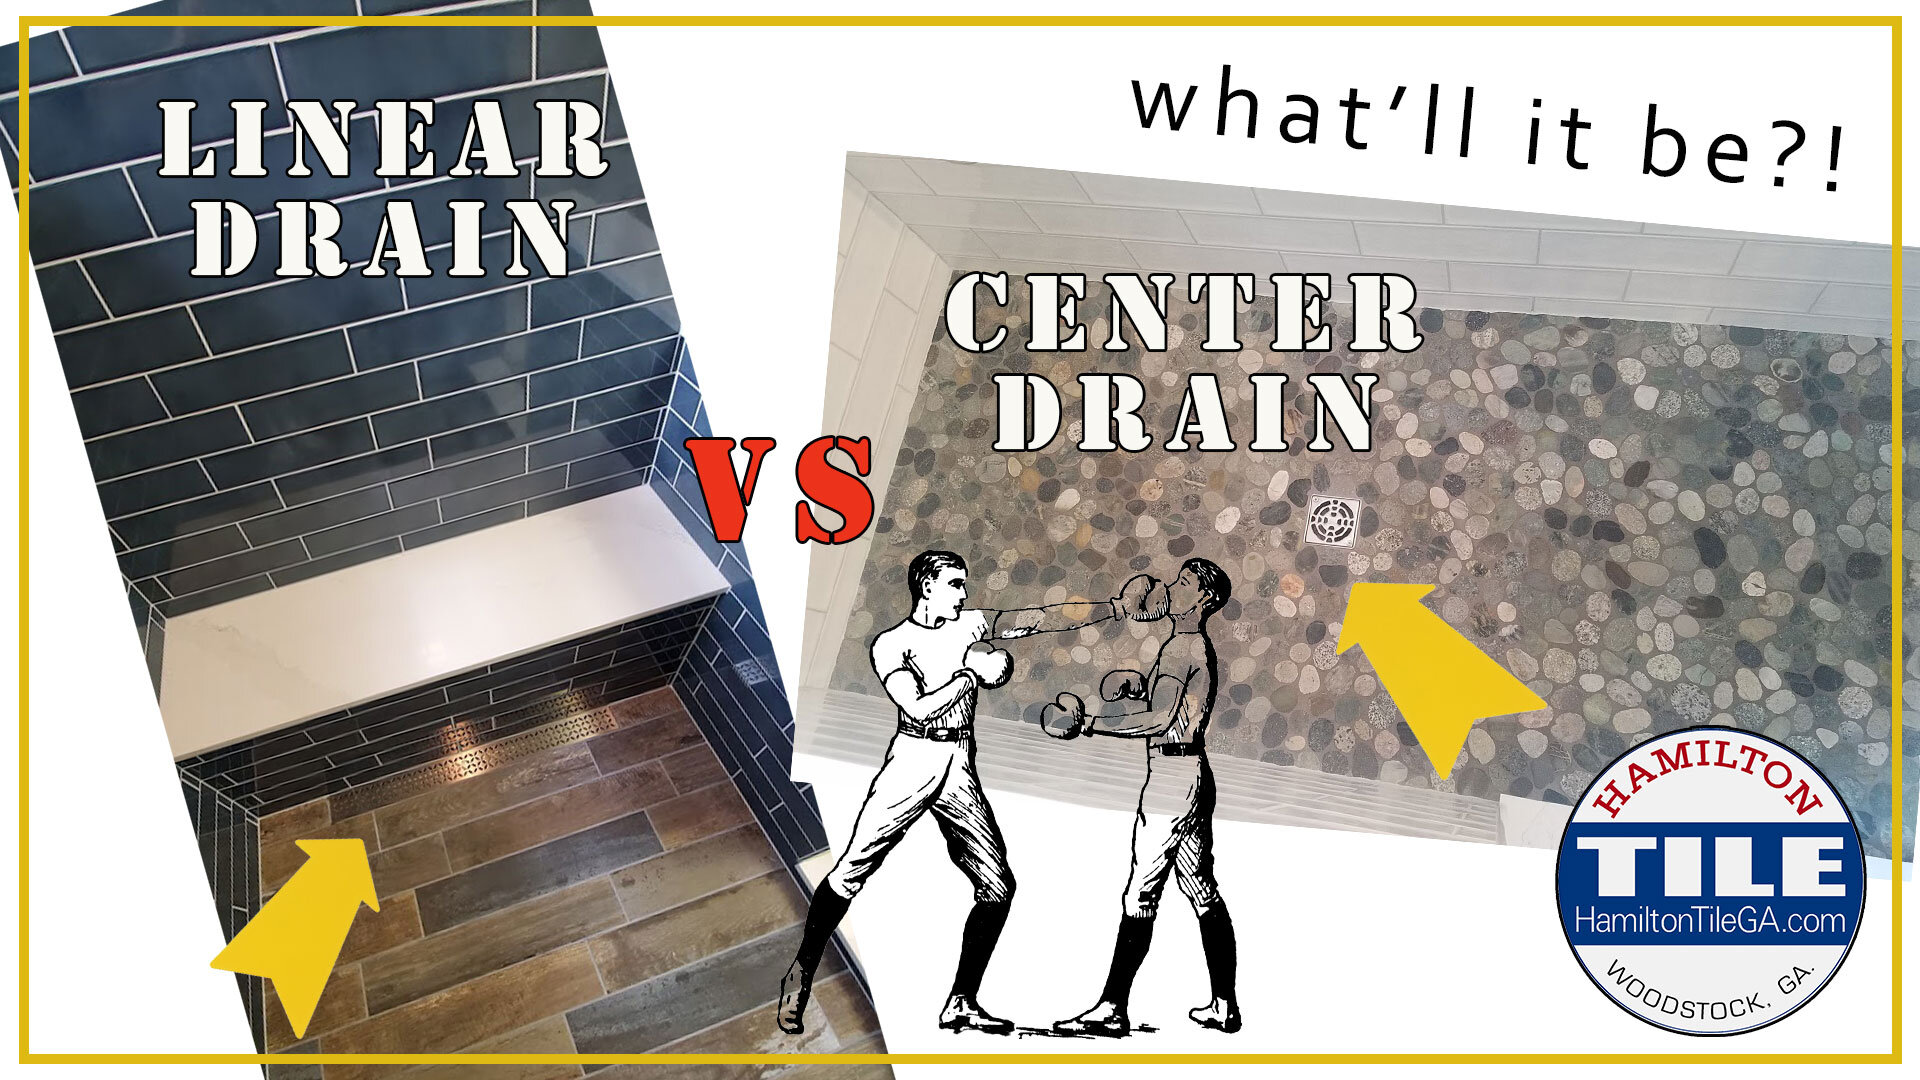
Linear vs. center shower drain: Pros and Cons.

centerlinearcaption.jpg

So you’ve started researching the construction of your new dream shower. I bet you never imagined that so much went into this section of your home.

The planning stages of any tile work, especially your shower, is most certainly the hardest part. There are so many options and so many finishes, the kicker being that they are all EXPENSIVE and PERMANENT.

O JOY!

One often overlooked item: THE DRAIN.

What is a drain?

It’s the place the water from the shower head goes to leave the shower system. It goes down that metal grate that is located in the shower pan. The water goes to this grate because the shower pan is sloped that way. The water goes into the grate which is connected to pipe that brings it to the sewer system.

As with everything in life, there are OPTIONS for your drain…Generally, most builders use the cheap $10 plastic ones, but you deserve FAR better than that in your dream bathroom.

There are drain options like, finish, color, shape, design and the topic of this article,

Check out this article explaining the difference between a Schluter shower drain and a 3 piece shower drain for a water in water out shower system.

LINEAR OR CENTER.

The crazy part here: linear can also be a center drain. MIND BLOWN.

But, in the interest of limiting confusion a “center drain” is going to be classified as a 4'“ square or circle. I’ll also state that this type drain doesn’t need to be centered, either. It can’t be located anywhere in the shower pan, really.

But, for this article, the smaller 4” located in the middle of the shower pan will be called a “center drain”.

CENTER DRAIN

So, what’s so great about a center drain?

For the cost conscious, center drains are the most inexpensive. You can get one for as little as $10. The Schluter ones we use, that look great, run around $100. They are also easier to install, so a beginner or a DIY homeowner can realistically put one in themselves.

Most people get center drains, so tile guys are used to installing them. Installation of a center drain is tile guy 101 so the possibility of running in to problems with the installation is far less.

When buying a center drain we recommend getting a shower floor tile that is under 3” to better conform with the shape of the pan and to also allow for better, more secure footing.

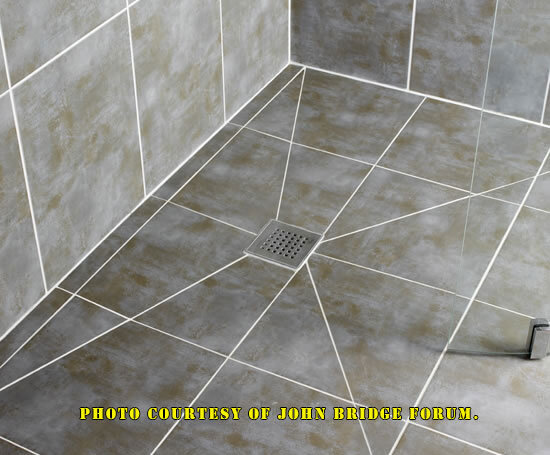
Although smaller tile is recommended you can use bigger tile, but your shower floor will have to be “envelope cut” which is a more technical installation technique.

IMPEY_UK_Aqua_Grade_wet_room_floor_formers_4-1.jpg

Center drains are also less maintenance. The water goes down this drain at such a speed and volume that you rarely have to take the grate off and they almost clean themselves with very little extra maintenance.

You have a world of finishes available for your center drain. Most match the drain to the finish of their bathroom fixtures, but you can essentially do any color or a custom designer drain like these:

www.DesignerDrains.com

This company was featured on Shark Tank and they can make you a drain grate cover with a tremendous design, like a fish, a tree, your company logo or your name. WHATEVER YOU CAN THINK OF.

All shower configurations support the use of a center drain. If you’re building a “zero entry” or a “curbless” shower you can use one, if you have a curb you can use one too. They are the most versatile of all drain types.

Center drains are not as glorious looking. They’re not the drain to use if you want to IMPRESS. Esthetically, they are not as pleasing as the linear option. They just don’t LOOK as cool.

Center drains are the more FUNCTIONAL, COST EFFECTIVE option.

They’re great at what they do, taking the water out of the shower!

But of course they can be as SMOKING and as custom as you want!

LINEAR DRAIN

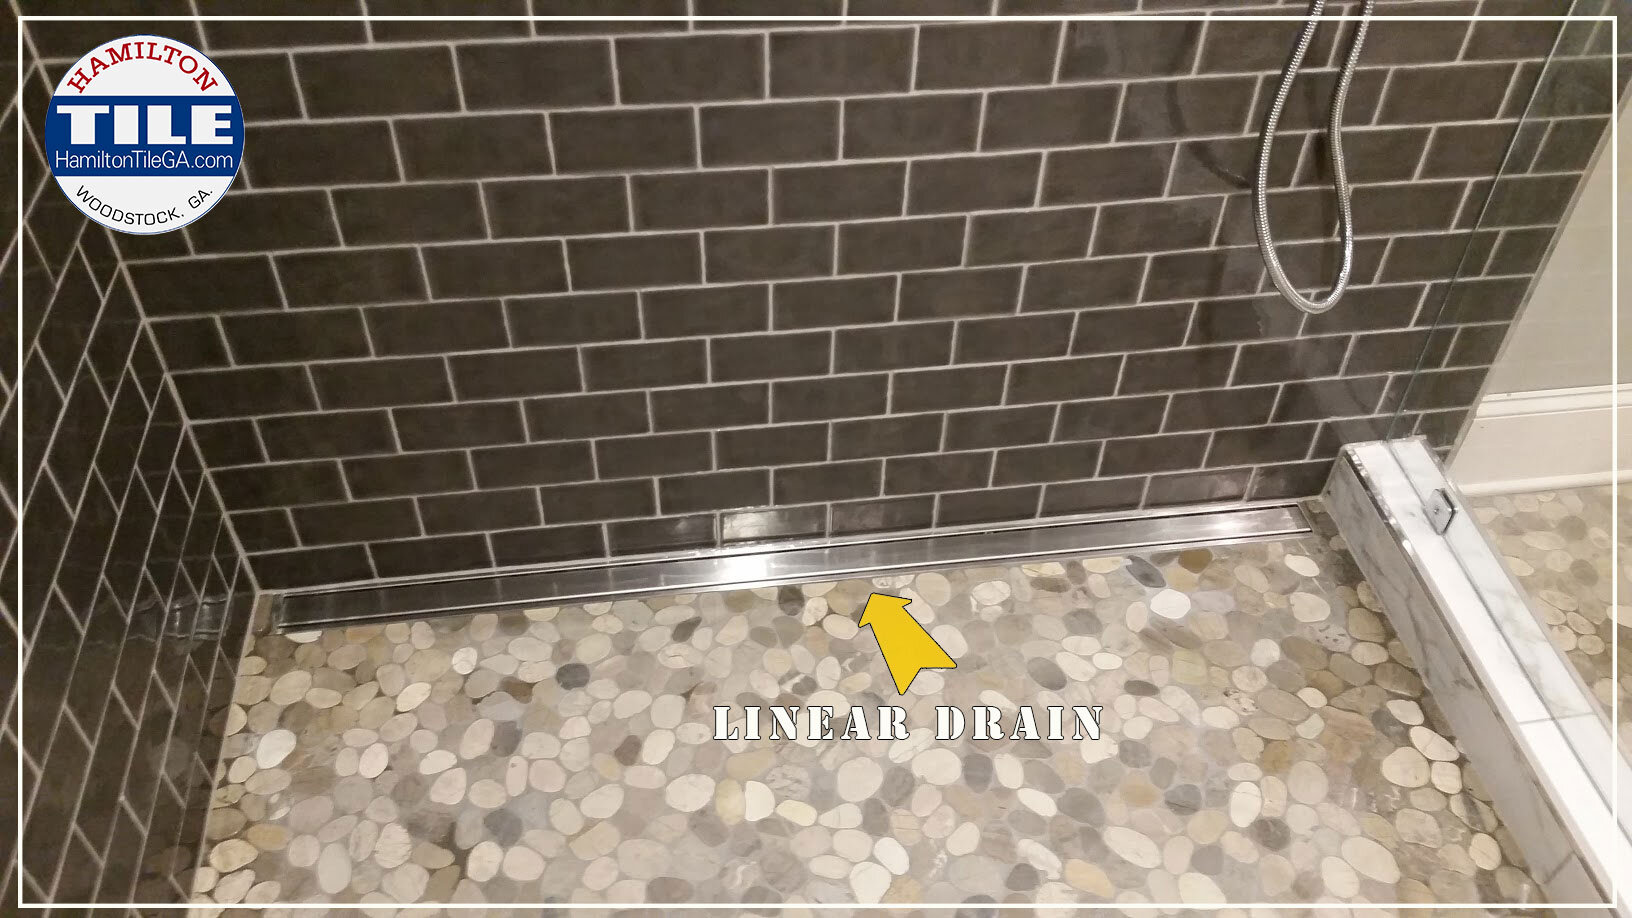
20170327_121733-1.jpg

Linear drains, heavy on LOOKS and FORM . They’re show stoppers when you look at them.

They are very long and can span from one side of a shower to the other.

“Wow, that looks expensive!”

Well, mostly because they are! That is a big downside of a linear drain. They cost a ton of money in comparison to a center drain. More money for the drain itself and also more money to put it in because there is a higher degree of precision involved with their installation.

These drains are TRICKY to put in. The plumbing has to be set up more EXACT. They have to be installed perfectly level. Don’t think that any Joe Schmo handy man can put one of these in!

We went to one job to help and saw a linear drain put in COMPLETELY WRONG and not to manufacturer specifications. “SORRY, your whole shower has to come out.”

True story.

So, highly skilled, expensive installers are necessary for these drains. Not only that,

Check out the prices on these things!

Of course, that doesn’t include the grate!

Now, you can get cheaper linear drains…but generally speaking, they’re cheaper for a reason. A lot of them are designed poorly or designed for an antiquated shower building method…Don’t go cheap on a shower. There’s a lot of water involved with showers and if you buy some cheap crap, you may pay more long term. If you’re trying to look like a spender, be a spender. Don’t be a faker!

As stated above, they’re expensive but they look OUTSTANDING.

People use them because they can use the same tile throughout the entire bathroom, including the shower and they can place the linear drains in interesting places because the shower pan will only be sloped in ONE direction, rather than like a bowl when you are using a center drain.

This client wanted his drain in front of the shower bench, so we obliged.

And, as you can see we used a large format tile that matched the outside bathroom floor.

With a linear drain, think CONTINUITY. CONTINUITY of a type of tile, CONTINUITY of a theme. If you want to really have continuity, get a tileable grate, like this one here.

What is another major downside of a linear drain other than the cost?

THE MAINTENANCE!

When the water from the shower goes into a long, linear drain, the VELOCITY of the water slows down considerably. The longer the drain, the slower the water velocity to evacuate the water out of the system. So, you have to clean a linear drain VERY often. Clean it of the hair, the dirt, the grime from your daily shower. The drain is at a slight pitch and it simply slows down the flow of the water, so you have to CLEAN a linear drain MUCH more often.

So, more of a pain in the ass to put in, more money, less functional.

But DAMN do they look COOL!

Check out this video of a shower we made to see the process of putting in a linear drain as well as the finished product:

DANG! Look at these OLD Hamilton Tile videos! Oh, the improvement.

That’s the break down from a pro installer!

Choice is great, but it puts a bit of PRESSURE on every selection for your bathroom.

Ultimately, your shower is a one time thing. Re-sale value of your house is super important. Getting what you WANT is probably most important. So, that’s where I always lean. Get what you WANT. Your bathroom is a once in your lifetime thing. Make it look and work the way you want to make it look and work.

If functionality is important to you….get a center drain. If looks are important to you and cost not an object, get a linear drain. If you couldn’t care less at all, GET A PLASTIC SURROUND and use your money for something else!

Thanks for reading.

© 2023 HamiltonTileGA.com

Ben here, the curator of this site. This site is here not only as an informational tool for you, but also a promotional tool for our company Hamilton Tile, LLC. Tile and bathroom remodeling is what we do for a living, it’s how we support our families. If you are in our local area and you have a project that you think we would be a good fit for, please contact us. My e-mail is Ben@HamiltonTileGA.com and our office number is 770-675-6916. We would love to display our brand of quality and service in your home. Please follow us on Instagram and Facebook @hamiltontilega . Thanks for being here. For podcast or radio interviews contact us using the contact info above. Please consider DONATING BELOW. THANKS! Just click the photo.

Bad Builder Spotlight: 2 year old tile work FAIL.

Another case of awful builder tile work in a two year old house. This time, it is a Pulte home and it’s the same old story!

Poor quality work, leaking shower…small repair that doesn’t solve the problem again and again, until the warranty runs out.

Luckily, these homeowners found us and will now have it done right.

This type of situation is rampant in the construction business. Do your research. Be aware. Pay more!

I’ve written a comprehensive assessment of why homeowners have problems when remodeling. Read it here: Why do homeowners get cheated during home remodeling?

Tile isn’t cheap or affordable and thinking it is may get you in a construction nightmare!

I feel for people buying new homes right now because most of the tile work is exactly like this. There’s not a good solution for you other than not buying the house and people buy houses based on more than just the tile work.

Be prepared to remodel if you can’t live with ugly, failing tile work!

The solution to all this is CONSUMER based. Educated buyers that value and are willing to pay for craftsmanship.

Remember, what you want has a HUMAN COST. You’re not buying tile work…you’re buying the people putting in your tile.

Tile work is not affordable.

I know finding a “deal” is the highest human virtue.

Fight the urge and avoid the head aches!

The best way to get a deal on tile work, is only having to do it ONCE.

Be sure to check out the inquiries for help with construction nightmares below this video. It’s REAL.

People read my blog from all over the world but I can’t get my neighbors to educate themselves before major home improvements...

What I really wish is that I could have saved these people from the problems they are experiencing.

We are not lying when we say watch out!

Below are just a fragment of the calls we get in regards to bad tile, leaking showers, bathroom nightmares:

20200911_132643-1.png
20200911_132704-1.png
20200911_132727-1.png
20200911_132745-1.png
20200911_132800-1.png
20200911_132818-1.png
20200911_133918-1.png
20201027_130853-1.jpg
anotherbad2.jpg
anotherbadone.jpg
Screenshot_20200613-110631_Email-1.jpg
Untitled-2.jpg
Untitled-4.jpg
UPDATEDBADWORK.png

If you need help,

If you’d like to make lousy builders pay,

WE CAN HELP!

Call us today if you are in Woodstock, GA (or the surrounding areas) and let us know you’d like to use our TILE INSPECTION SERVICES.

We can help you get FULL REPLACEMENT or your MONEY BACK.

We are the experts that you need.

Not only will we provide the service below…We will also provide a VIDEO EXPLANATION that you can present to your builder or legal representation.

We have had great success with this service and we are excited to help you rectify your situation.

CONTACT US NOW TO FIND OUT MORE!

failuread.jpg

© 2023 HamiltonTileGA.com

Ben here, the curator of this site. This site is here not only as an informational tool for you, but also a promotional tool for our company Hamilton Tile, LLC. Tile and bathroom remodeling is what we do for a living, it’s how we support our families. If you are in our local area and you have a project that you think we would be a good fit for, please contact us. My e-mail is Ben@HamiltonTileGA.com and our office number is 770-675-6916. We would love to display our brand of quality and service in your home. Please follow us on Instagram and Facebook @hamiltontilega . Thanks for being here. For podcast or radio interviews contact us using the contact info above. Please consider DONATING BELOW. THANKS! Just click the photo.

8 installation details that make our bathrooms BETTER.

wise.jpg

Hello! It’s been awhile!

Admittedly, I’ve fallen from posting on my blog regularly. Sometimes I need a break. It’s been 4 years of posting, every two weeks or so and I experienced some burn out. A small break, but the blog was not forgotten!

Today’s post is inspired by the vast pricing difference between Hamilton Tile and many of the other re-modelers/tilers in our area.

Why, Why, Why.

This blog has historically been about helping people to understand and this post is no different.

What are the details that make our bathrooms BETTER, therefore taking more time and also making them more VALUABLE?

Because ultimately, that’s what I am talking about. With Hamilton Tile, our higher price results in more VALUE. A bathroom or shower that looks better, lasts longer, and actually functions the way it should.

Also, our awareness of these details act as an ounce of PREVENTION. We take additional steps, so, (God forbid) when human error occurs out of our control, you as a homeowner can have the situation rectified much easier while minimizing damage and time.

So, what are these details that make us DIFFERENT?

HERE WE GO!

  1. No horizontal penetrations for glass panel installation.

    We spend many hours making our showers water proof. Not water resistant, WATERPROOF. Curbs, boxes, floors, walls…If there was a flood, we don’t want wood and water making contact.

    During the building process, everything is water proofed…tile is set, it’s grouted and siliconed, then the glass installation.

    During the glass installation many glass installers will put screw penetrations on horizontal surfaces for clips to hold the glass. Ours DO NOT!

    These clips are generally unnecessary. Silicone holds glass panels just fine. A screw hole on the curb can cause a leak! No amount of silicone will seal the hole.

    In the few scenarios that clips need to be installed to hold larger glass panels, our water proofing is preserved because we use 2” structural foam to build the curbs and not wood.

    Unless the glass installer uses a 6” screw (which he won’t) he will not contact wood because of HOW we build our showers and our expertise with our building system.

    When screws ARE necessary, in the very few situations, we make sure our water proofing is protected.

    No penetrations on a horizontal surface results in a sealed shower area, a sealed curb. A water proof curb.

    Our projects are better because we do not give water a chance to destroy your investment.

    Let’s take a look at what I mean:

Grout that is falling out on a curb is a sign of moisture penetration. The wooden curb is getting wet and is expanding and contracting which is causing the grout to fall out.

Grout that is falling out on a curb is a sign of moisture penetration. The wooden curb is getting wet and is expanding and contracting which is causing the grout to fall out.

Take a look at what our shower glass installation:

No curb penetration for the glass because they are not necessary. No leak potential.

No curb penetration for the glass because they are not necessary. No leak potential.

2. Plastic under our tubs is looking ahead to the future!

When installing plastic or fiberglass pans or tubs it is imperative that you set them on a bed of sand mix concrete. This is the support that the tub needs to not crack or move. Improper support under plastic tubs and shower pans is a major culprit for leaks and failures.

An issue arises if you ever have to take the tub out. The sand mix will stick to the bottom of the tub making it impossible to remove. If you are able to remove it, you may damage the tub.

I get it, you should never have to remove the tub. But what happens if you do? Maybe a manufacturer error, etc.

Well, our ounce of prevention is when we set our tub in the concrete, we put plastic between the tub and concrete making it easier to remove if we ever have to.

Our bathrooms are better because we think ahead for our clients.

Take a look:

Plastic between the tub and sand mix concrete will make it possible to take the tub out (without damage) if you ever have to.

Plastic between the tub and sand mix concrete will make it possible to take the tub out (without damage) if you ever have to.

3. We use 100% SILICONE in all plane changes inside a bathroom.

We use 100% silicone in all plane changes (like corners) to create a soft joint for movement. Many installers grout their corners tight. This saves time for the installer, making their projects cheaper, but causes big problems for the home owners when their corners CRACK.

Corners CRACK because houses MOVE. A soft joint in the corners and all plane changes account for that movement!

Take a look at what I mean:

20190711_113525-1.jpg

And here’s how we do it:

20190914_105041-1.jpg

There’s a right way to do things and a wrong way. Many installers do it the wrong way because it is easier. For us to silicone your shower or backsplash takes a lot of extra time, effort and skill. That’s why our projects cost more. Most installers take the easy, lazy way out and you eventually pay the price.

To clarify: 100% silicone is not “SILICONIZED”. Siliconized caulking is not a sealant because it is a latex product.

100% silicone is not water based and is rated for inside a wet area.

caulking-graphic.jpg

Hiring a specialist gets you specialized talents and skills. Like silicone. Give it a try yourself and you’ll understand.

IMG_20190318_145902.jpg

4. We build a removable panel underneath your tub deck.

A removable tile panel under your tub deck makes it possible to repair plumbing leaks or problems underneath the tub. Hopefully this will never happen, but wouldn’t it be awful if your plumbing fixture was built poorly from the factory and ten years after your bathroom was done it starts to leak?

It has happened!

If your panel is not removable someone has to destroy the tile on the front to access the plumbing or cut your ceiling open. Maybe you can’t get the same tile to replace the damaged tile!

A nightmare!

We build removable tile panels, so if you ever have to access under the tub…you cut the silicone perimeter and carefully remove the panel. When you are done. You replace it. EASY!

20200429_122304.jpg

Here’s what it looks like when it’s done:

IMG_0126.JPG

Very common sense, but most installers will not leave access for under the tub. It’s faster and easier to just tile it all in and leave the potential problem for the homeowner in the future.

When you put lifetime guarantees on your work, you simply perform your work DIFFERENTLY.

Our bathrooms are better because we have your best interest in mind!

5. We build benches with out penetrations into the waterproofing!

Why is this important?

No penetrations around your shower bench is important because most leaks start around the bench!

Most people build their benches out of wood and they’ll screw and hammer nails all over the place. Any penetration is a leak POTENTIAL.

Check out this bench:

Black mold. Underneath this bench was a pond of filthy stinky water. YUM.

Black mold. Underneath this bench was a pond of filthy stinky water. YUM.

gem.jpg

Benches are a source of big problems.

We take the construction of our benches seriously.

We build ours out of 2” structural foam that is bonded to the outer waterproof layer and tiled around.

These benches are extremely strong:

20161217_121951_wm.jpg
20200824_093439.jpg
20200926_170627-1.jpg

Our bathrooms are better because they are designed to last. We take water very seriously.

6. Our soap niches are WATERPROOF!

Inset boxes/ soap niches are also a source of leaks and mold.

We build ours 100% water proof.

People will build their inset boxes out of wood. They won’t water proof them correctly. This causes failure.

Check out how we do ours:

soapnichewaterproofing.jpg

A foam inset box, coated with Ardex 8+9 water proof cement.

evolutionofasoapniche.png

Our bathrooms are better because we will show you what you are going to get.

There’s nothing worse than a leak. Unlike many other remodelers, we can show you how we do our work. Check out what you see above. That is what you’ll receive.

7. We don’t use wood curbs.

Wood and water don’t mix! Yes, you can waterproof the wood or outfit it with cement board that is waterproofed, but we cut to the chase.

We use 2” structural foam to build our curbs and there are no screws, nails or anything else to puncture or pierce the water proof envelope.

Check it out:

IMG_0755.JPG
20191114_110219.jpg
The 2” foam gets a waterproof membrane installed on top it with a water proof thin set called Ardex 8+9.

The 2” foam gets a waterproof membrane installed on top it with a water proof thin set called Ardex 8+9.

20191022_121233.jpg

What the other guys doing:

20190228_120730.jpg

The other guys build with wood curbs, layer it with rubber and then fasten cement board to the top of the rubber and wood using screws that ruins the water proof characteristics of the rubber.

There are correct ways to do this method.

MOST DON’T DO IT CORRECTLY.

Our bathrooms are better because we realize: WOOD AND WATER DON’T MIX!

8. WE FLOOD TEST OUR SHOWERS.

This one is common sense and not that special.

But, you’d be surprised to know that most “professionals” skip this step.

After the shower has been waterproofed, we dump a couple buckets of water in it and wait 24hrs to make sure it’s not leaking.

IMG_1129-1.jpg

Most tilers DO NOT do this step.

Why? Because it takes longer and slows down the project.

But wouldn’t you want to know the shower is leaking BEFORE you set tile?

One more time: An ounce of PREVENTION to protect YOUR INVESTMENT.

Check out the video below to learn more:

Bottom line:

We think 10 steps ahead and 20 years in the future.

We take our time on our projects. We take OUR time so you don’t have to use YOUR time in the future to fix a mess!

That is the difference. We want our projects to last so you only have to do your bathroom ONCE. It’s a very simple formula.

You have expectations, we appreciate that and we are not afraid to meet your expectations.

Thanks for reading.

On a side note, look at this blanket my mother in law made. It’s all my tile t-shirts combined into a blanket. What a great gift for a tiler!

On a side note, look at this blanket my mother in law made. It’s all my tile t-shirts combined into a blanket. What a great gift for a tiler!

© 2023 HamiltonTileGA.com

Ben here, the curator of this site. This site is here not only as an informational tool for you, but also a promotional tool for our company Hamilton Tile, LLC. Tile and bathroom remodeling is what we do for a living, it’s how we support our families. If you are in our local area and you have a project that you think we would be a good fit for, please contact us. My e-mail is Ben@HamiltonTileGA.com and our office number is 770-675-6916. We would love to display our brand of quality and service in your home. Please follow us on Instagram and Facebook @hamiltontilega . Thanks for being here. For podcast or radio interviews contact us using the contact info above. Please consider DONATING BELOW. THANKS! Just click the photo.

East Cobb, GA: A one of a kind bathroom remodel.

This post project video breaks down a remodel we recently completely in East Cobb, GA.

We go over the reasoning behind some of the finishing touches and talk about the in's and out's of this bathroom renovation.

Again, following a noticeable pattern, we completed this project for a very savvy homeowner who understands tile and it's proper installation. He was a regular on the John Bridge Forum which is a tile advice forum.

The homeowner did a lot of his own tile so he understood how it all worked and wanted it done correctly. It was pretty neat to be able to make him satisfied and to meet his standards.

We'd like to thank the DIY Tile Guy himself, Jim Upton, for recommending us for this job. Check out his site at www.diytileguy.com for a lot of great information on tile installation.

Thanks for watching!

Be sure to check out the beautiful project photos below:

Jason Hamilton- 20+ years in the tile business, 4 year trade school graduate, one of 1600 certified tile installers in the USA and also a nominee for 2019 NTCA tile crafts person of the year.You can trust him to build you an awesome bathroom.

Jason Hamilton- 20+ years in the tile business, 4 year trade school graduate, one of 1600 certified tile installers in the USA and also a nominee for 2019 NTCA tile crafts person of the year.

You can trust him to build you an awesome bathroom.

Jason is a pro. Jason understands that you have high standards and he is okay with that. In fact we are confident your standards are no where near as high as his personal standards.

Jason is a pro. Jason understands that you have high standards and he is okay with that. In fact we are confident your standards are no where near as high as his personal standards.

Our soap niches are waterproof. Simple as that. You’d be surprised how rare that is in the shower business.

Our soap niches are waterproof. Simple as that. You’d be surprised how rare that is in the shower business.

Thank you to Matt at Aab plumbing. Many tile guys who are not licensed plumbers and who are not insured to do plumbing will attempt to do plumbing for their clients. NOT US. We bring in our licensed plumber who is skilled and also insured for the ta…

Thank you to Matt at Aab plumbing. Many tile guys who are not licensed plumbers and who are not insured to do plumbing will attempt to do plumbing for their clients. NOT US. We bring in our licensed plumber who is skilled and also insured for the task.

You don’t need the insurance when everything goes how it should, you need it for when things eventually go WRONG.

As always, we made the panel in front of the tub removable so the client can always have access to the plumbing under the tub, if, God forbid, something needs to be fixed. Watch the video above to find out how we do it.

As always, we made the panel in front of the tub removable so the client can always have access to the plumbing under the tub, if, God forbid, something needs to be fixed. Watch the video above to find out how we do it.

I took this photo in the homeowner’s yard.

I took this photo in the homeowner’s yard.

This herringbone accent adds spice to this bathroom without exploding the cost of the install. Watch the video to learn how this herringbone pattern can really add to the bottom line of your bathroom install.

This herringbone accent adds spice to this bathroom without exploding the cost of the install. Watch the video to learn how this herringbone pattern can really add to the bottom line of your bathroom install.

The beautiful tile installation in East Cobb County, GA.

The beautiful tile installation in East Cobb County, GA.

We call it a corner bench, but in reality it’s a leg shaving shelf. Custom made to the client’s specifications.

We call it a corner bench, but in reality it’s a leg shaving shelf. Custom made to the client’s specifications.

We installed the stone tops on this bathroom remodel, doing it ourselves—-the only way to ensure perfection.

We installed the stone tops on this bathroom remodel, doing it ourselves—-the only way to ensure perfection.

Schluter corner shelf is a clean look, the finish matching the fixtures in this shower…It’s an excellent spot to put the over flow that doesn’t fit in your soap niche. Keep that corner bench free!

Schluter corner shelf is a clean look, the finish matching the fixtures in this shower…It’s an excellent spot to put the over flow that doesn’t fit in your soap niche. Keep that corner bench free!

© 2023 HamiltonTileGA.com

Ben here, the curator of this site. This site is here not only as an informational tool for you, but also a promotional tool for our company Hamilton Tile, LLC. Tile and bathroom remodeling is what we do for a living, it’s how we support our families. If you are in our local area and you have a project that you think we would be a good fit for, please contact us. My e-mail is Ben@HamiltonTileGA.com and our office number is 770-675-6916. We would love to display our brand of quality and service in your home. Please follow us on Instagram and Facebook @hamiltontilega . Thanks for being here. For podcast or radio interviews contact us using the contact info above. Please consider DONATING BELOW. THANKS! Just click the photo.

Woodstock, GA: Tile Patio floor MAKEOVER!

It was a hot week for the guys at Hamilton Tile during this Woodstock, GA tile patio makeover. 80 degree temperatures brought out our inner toughness and tested our endurance!

We are admittedly indoor cats, but at the same time we are not afraid of some hard work.

This video documents our week of installing this patio floor and the techniques we used in order to get it done "to last", because what's the point of tile if you don't get it's lifetime qualities?

Again and again, over and over...we provide our customers with top quality work and an excellent home improvement experience. It's not a one off or a fluke.

Check out this video for tips and tricks, laughs and looks. I want to thank you for being here and watching our journey.

Cheers to prosperity, health and happiness.

20200630_180827.jpg
A beautiful floor….but there’s more than meets the eye. What’s UNDERNEATH this tile, is what gives this floor it’s lasting and quality characteristics.

A beautiful floor….but there’s more than meets the eye. What’s UNDERNEATH this tile, is what gives this floor it’s lasting and quality characteristics.

EVERY tile, had this kind of thin set coverage. You have to TRY to get this with a conscious plan and persistence.

EVERY tile, had this kind of thin set coverage. You have to TRY to get this with a conscious plan and persistence.

Our whole plan of attack is focused on this control joint. These joints allow the cement slabs to move independently. You may have them in your cement. They must be honored with a soft joint if tile is installed on top. Not having a soft joint on to…

Our whole plan of attack is focused on this control joint. These joints allow the cement slabs to move independently. You may have them in your cement. They must be honored with a soft joint if tile is installed on top. Not having a soft joint on top of this control joint can cause cracked tile. There must be expansion joints on all big floors.

We installed a membrane on top of this control joint to keep it free and open when we installed the tile.

We installed a membrane on top of this control joint to keep it free and open when we installed the tile.

Screenshot-(62)-1.png
This entire floor received two coats of Ardex 8+9 to act as a crack isolation membrane to help prevent cracking tile which has a higher probability of happening if tile is set direct to the concrete.

This entire floor received two coats of Ardex 8+9 to act as a crack isolation membrane to help prevent cracking tile which has a higher probability of happening if tile is set direct to the concrete.

IMG_0489 (1).JPG
The original control joint in the cement is under this grout line. It is being filled with 100% silicone, which is flexible, to act as an expansion joint. This silicone matches the grout color.

The original control joint in the cement is under this grout line. It is being filled with 100% silicone, which is flexible, to act as an expansion joint. This silicone matches the grout color.

The entire perimeter—- anywhere there was a plane change, was filled with flexible silicone sealant.We promise: No cracked grout in corners if you don’t use grout. Silicone is far superior because it lasts.

The entire perimeter—- anywhere there was a plane change, was filled with flexible silicone sealant.

We promise: No cracked grout in corners if you don’t use grout. Silicone is far superior because it lasts.

Here’s a couple examples of tiles “tenting”. This will happen sometimes if tile floors have no room for expansion.

© 2023 HamiltonTileGA.com

Ben here, the curator of this site. This site is here not only as an informational tool for you, but also a promotional tool for our company Hamilton Tile, LLC. Tile and bathroom remodeling is what we do for a living, it’s how we support our families. If you are in our local area and you have a project that you think we would be a good fit for, please contact us. My e-mail is Ben@HamiltonTileGA.com and our office number is 770-675-6916. We would love to display our brand of quality and service in your home. Please follow us on Instagram and Facebook @hamiltontilega . Thanks for being here. For podcast or radio interviews contact us using the contact info above. Please consider DONATING BELOW. THANKS! Just click the photo.

Canton, GA: Local builder tile work SPOTLIGHT.

Light is known to cleanse.

Today we spotlight a local builders atrocious lack of standards and the difference between the "BLOW AND GO/MACHINE GUN INSTALLERS" and what we do at Hamilton Tile.

The difference couldn't be any more STARK.

It's very valuable to us to have this CONTRAST.

We take a "blow and go" job apart and break it down, so you can know what to expect when you hire the vast majority of "builders".

Construction is no longer your Gram-pa's business!

Once the "machine gun" installers work is taken apart, we display what we do and why it's objectively better.

There is a reason "builders" have a bad reputation. There is a reason why people feel disgust when they hear the word "contractor".

Years of broken trust and false promises have lead to where we are today.

Putting a spotlight on the wrongs, I believe, is the way forward.

It's not hearsay or rumors...it's tangible evidence displayed.

Not all builders are bad! But it's rare to meet a great one!

To be frank, we are lucky, because there will be plenty of work for tile guys in the future!

© 2023 HamiltonTileGA.com

Ben here, the curator of this site. This site is here not only as an informational tool for you, but also a promotional tool for our company Hamilton Tile, LLC. Tile and bathroom remodeling is what we do for a living, it’s how we support our families. If you are in our local area and you have a project that you think we would be a good fit for, please contact us. My e-mail is Ben@HamiltonTileGA.com and our office number is 770-675-6916. We would love to display our brand of quality and service in your home. Please follow us on Instagram and Facebook @hamiltontilega . Thanks for being here. For podcast or radio interviews contact us using the contact info above. Please consider DONATING BELOW. THANKS! Just click the photo.